How can we help?
Get help straight from our team...
smartsites
Staff Vacancies
Get started with our staff vacancies plugin
Updated 3 weeks ago
Staff Vacancies Plugin - User Guide
Table of Contents
Introduction
The Staff Vacancies plugin allows you to manage and display job vacancies on your WordPress website. It provides an easy-to-use admin interface for creating and managing vacancies, and shortcodes for displaying them on your site.
Key features include:
Simple vacancy management system
Customisable vacancy details
File attachments for job descriptions or application forms
Automatic vacancy expiration based on deadline dates
Multiple display options (cards or table view)
Individual vacancy pages with detailed information
Admin Area Guide
Accessing the Admin Interface
Log in to your WordPress admin dashboard
Navigate to "Smart Stuff" in the main menu
Select "Staff Vacancies Settings" from the dropdown menu
Managing Vacancies
The main Staff Vacancies Settings page displays a table of all current vacancies with the following information:
Position
Job Description (truncated)
Application Opens date
Application Deadline
Location
Actions (Edit, Copy, Delete)
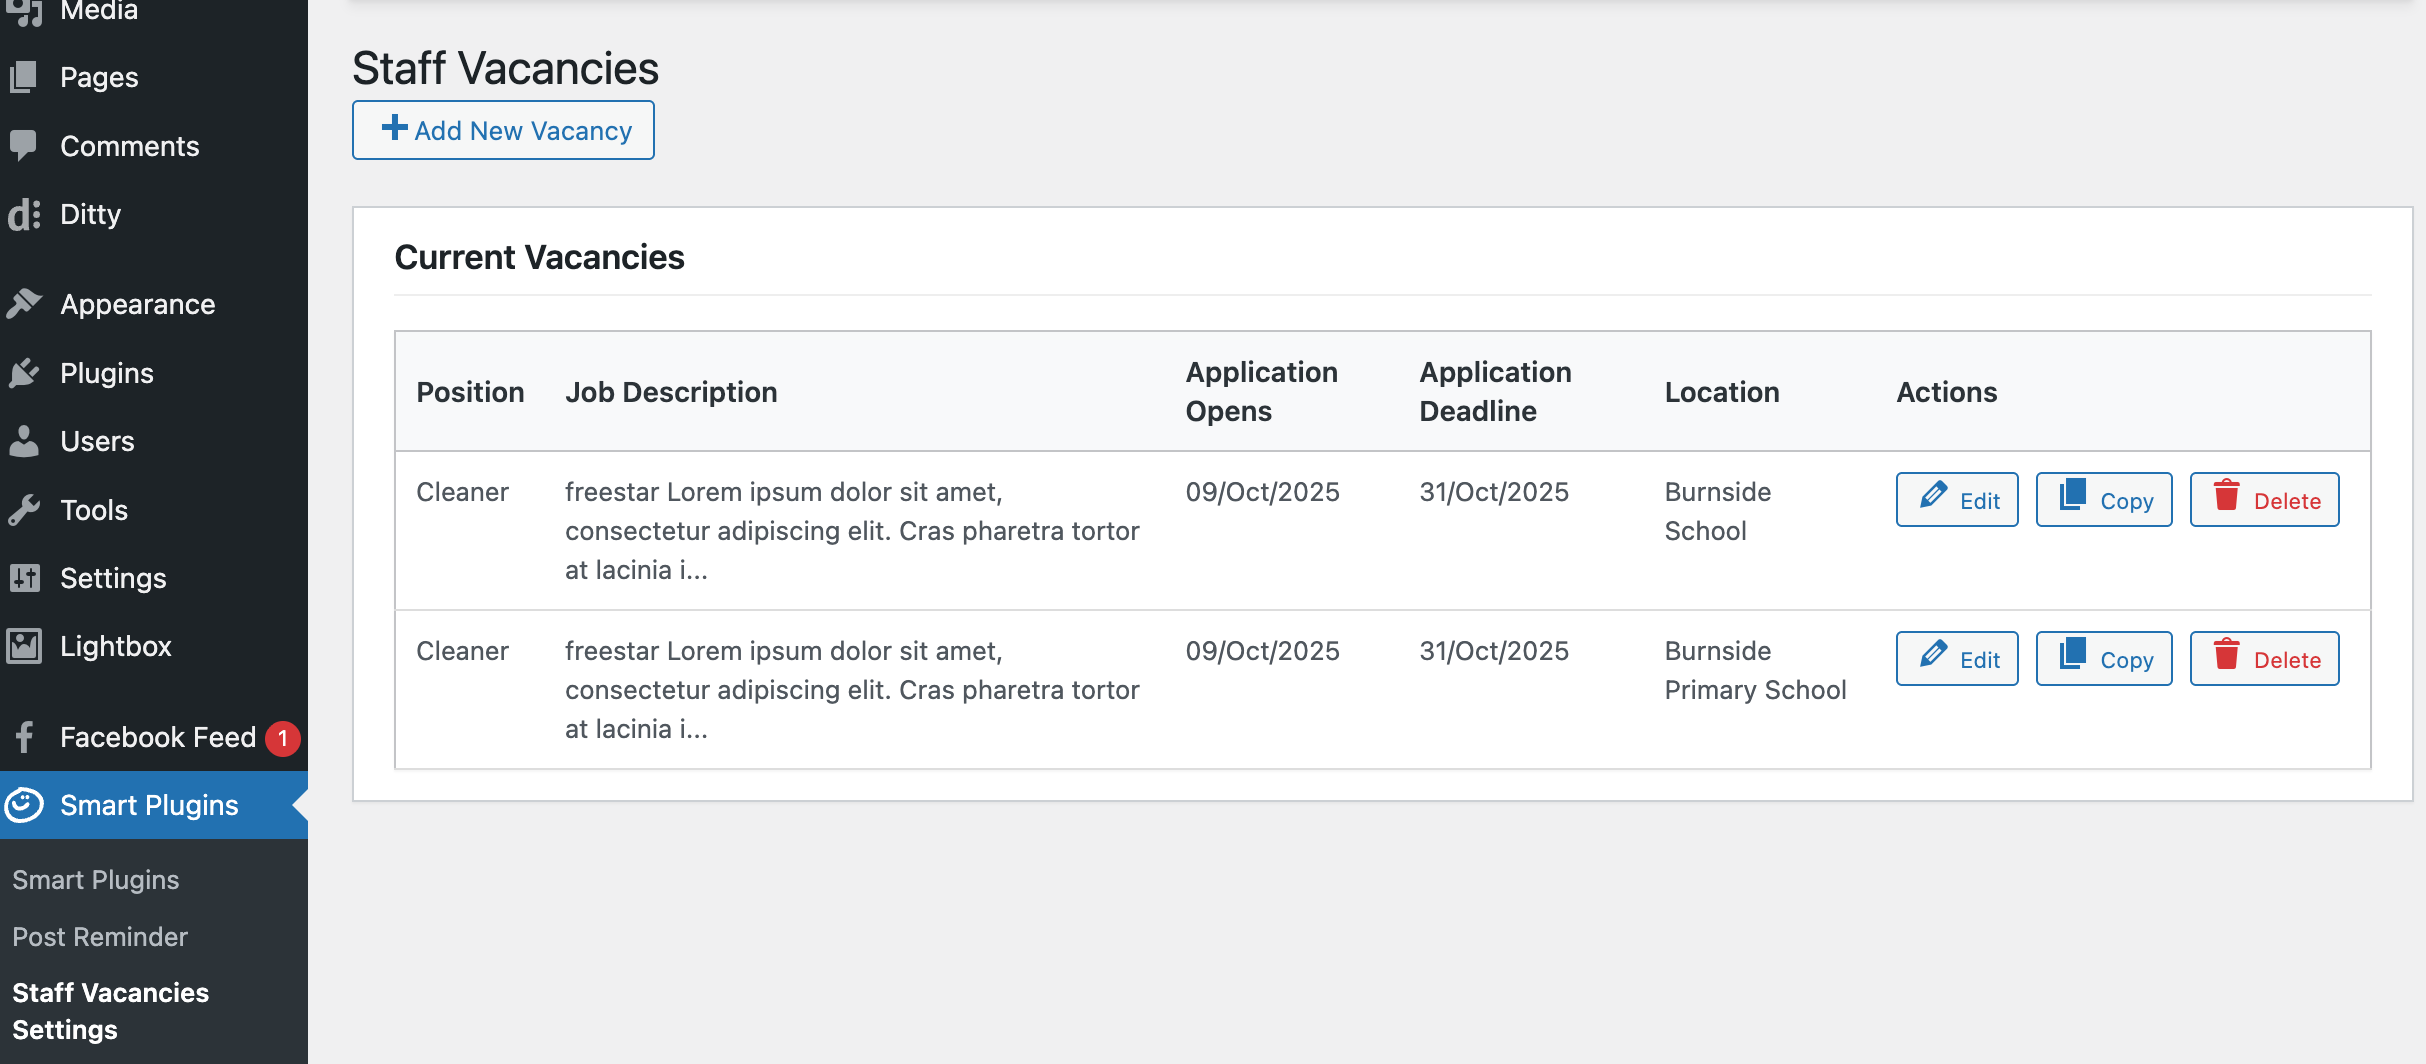
Creating a New Vacancy
From the Staff Vacancies Settings page, click the "Add New Vacancy" button at the top of the page
Fill in the vacancy details (see Field Descriptions below)
Click "Save Vacancy" to create the new vacancy
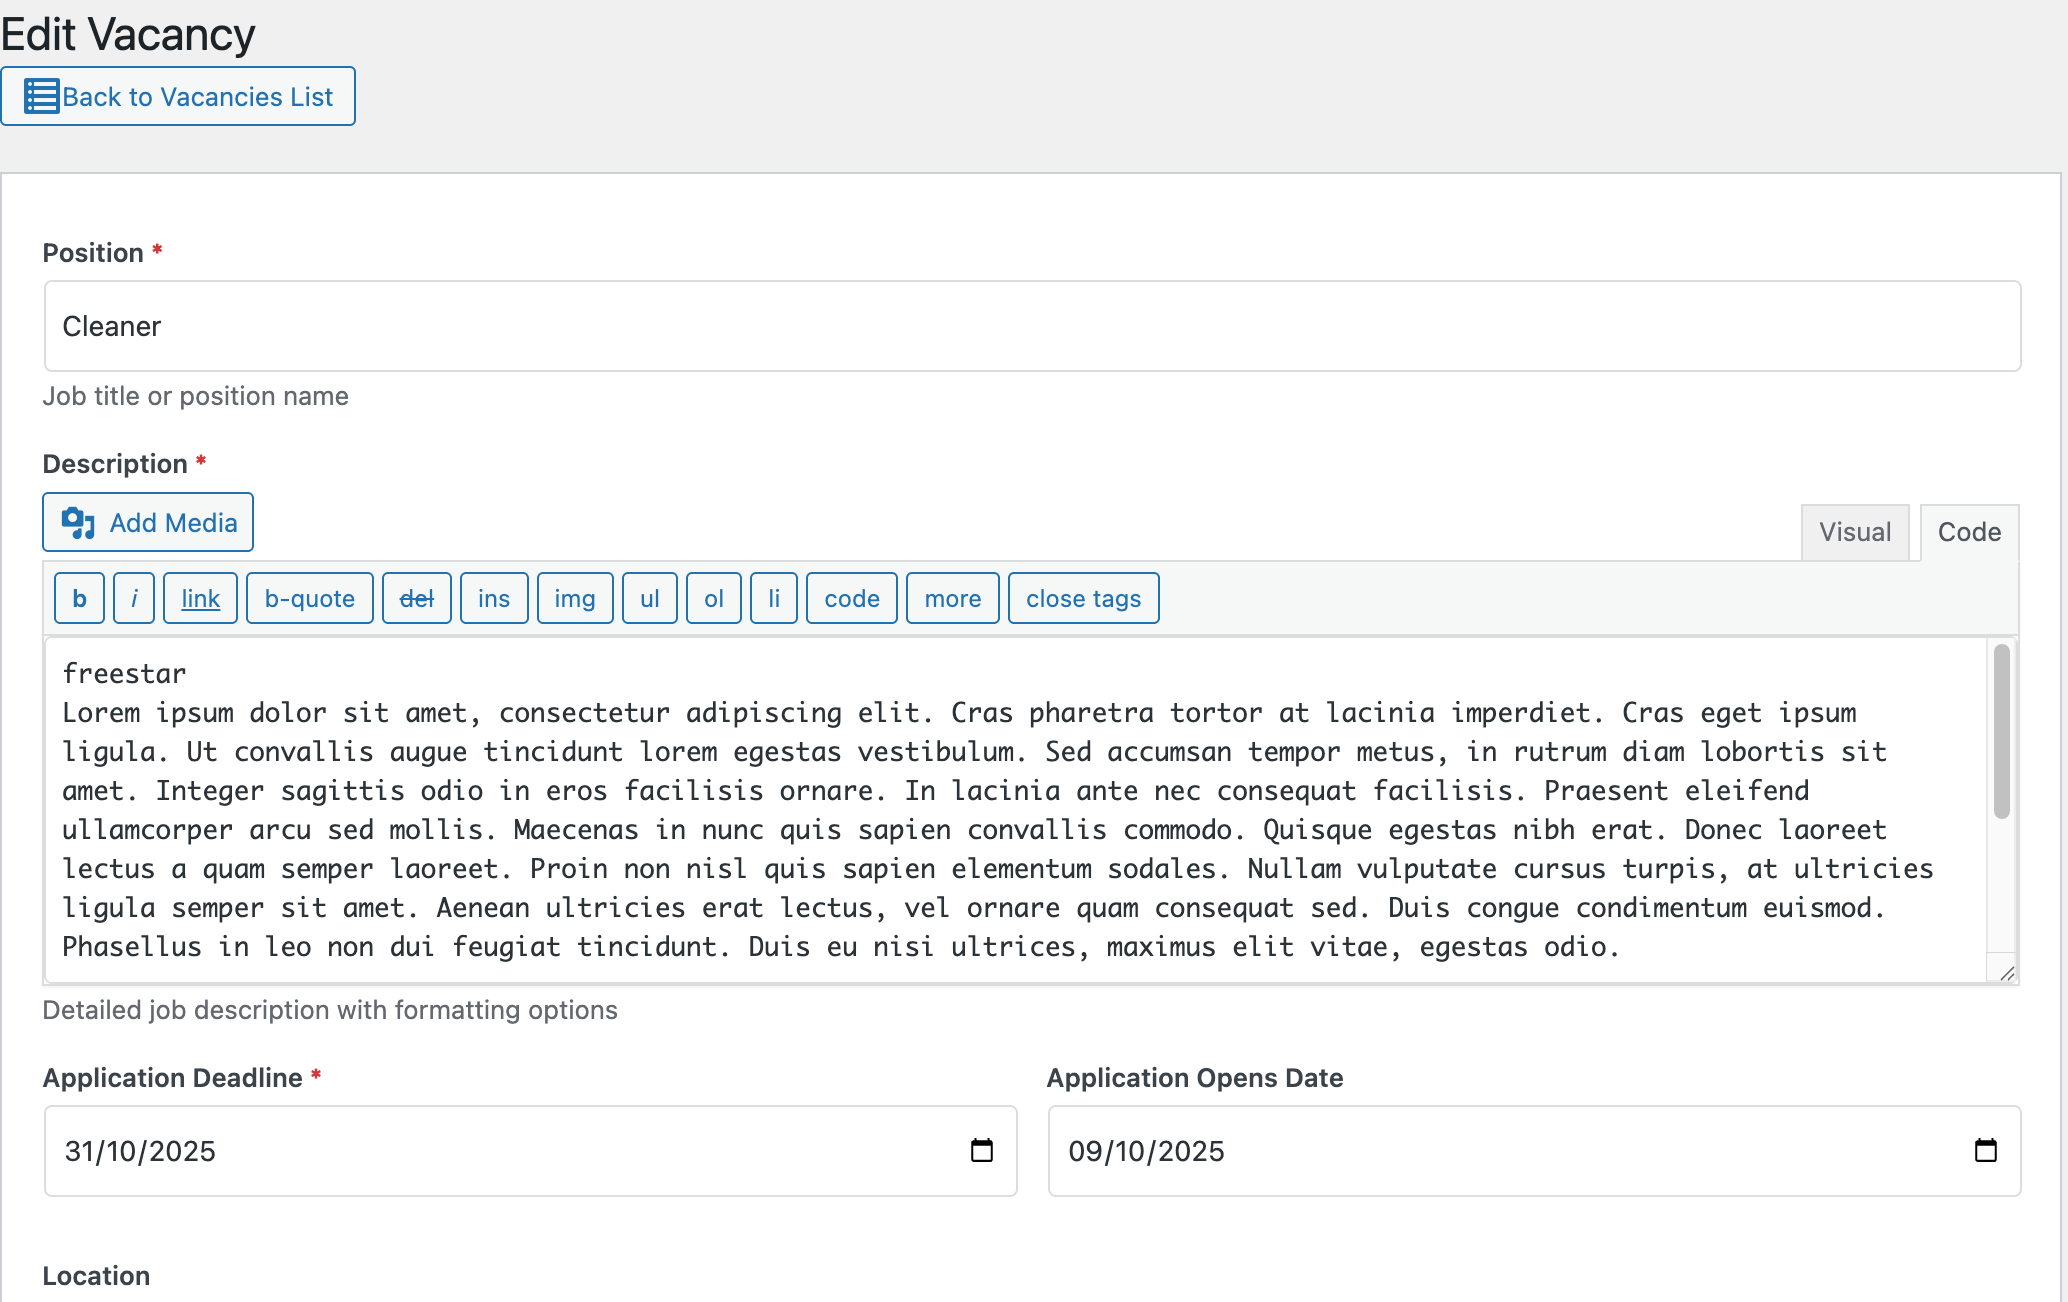
Editing a Vacancy
From the Staff Vacancies Settings page, find the vacancy you want to edit
Click the "Edit" button in the Actions column
Make your changes to the vacancy details
Click "Update Vacancy" to save your changes
Copying a Vacancy
From the Staff Vacancies Settings page, find the vacancy you want to copy
Click the "Copy" button in the Actions column
A new "Add New Vacancy" form will open with all fields pre-populated from the copied vacancy
Make any necessary changes
Click "Save Vacancy" to create the new vacancy based on the copy
Deleting a Vacancy
From the Staff Vacancies Settings page, find the vacancy you want to delete
Click the "Delete" button in the Actions column
Confirm the deletion when prompted
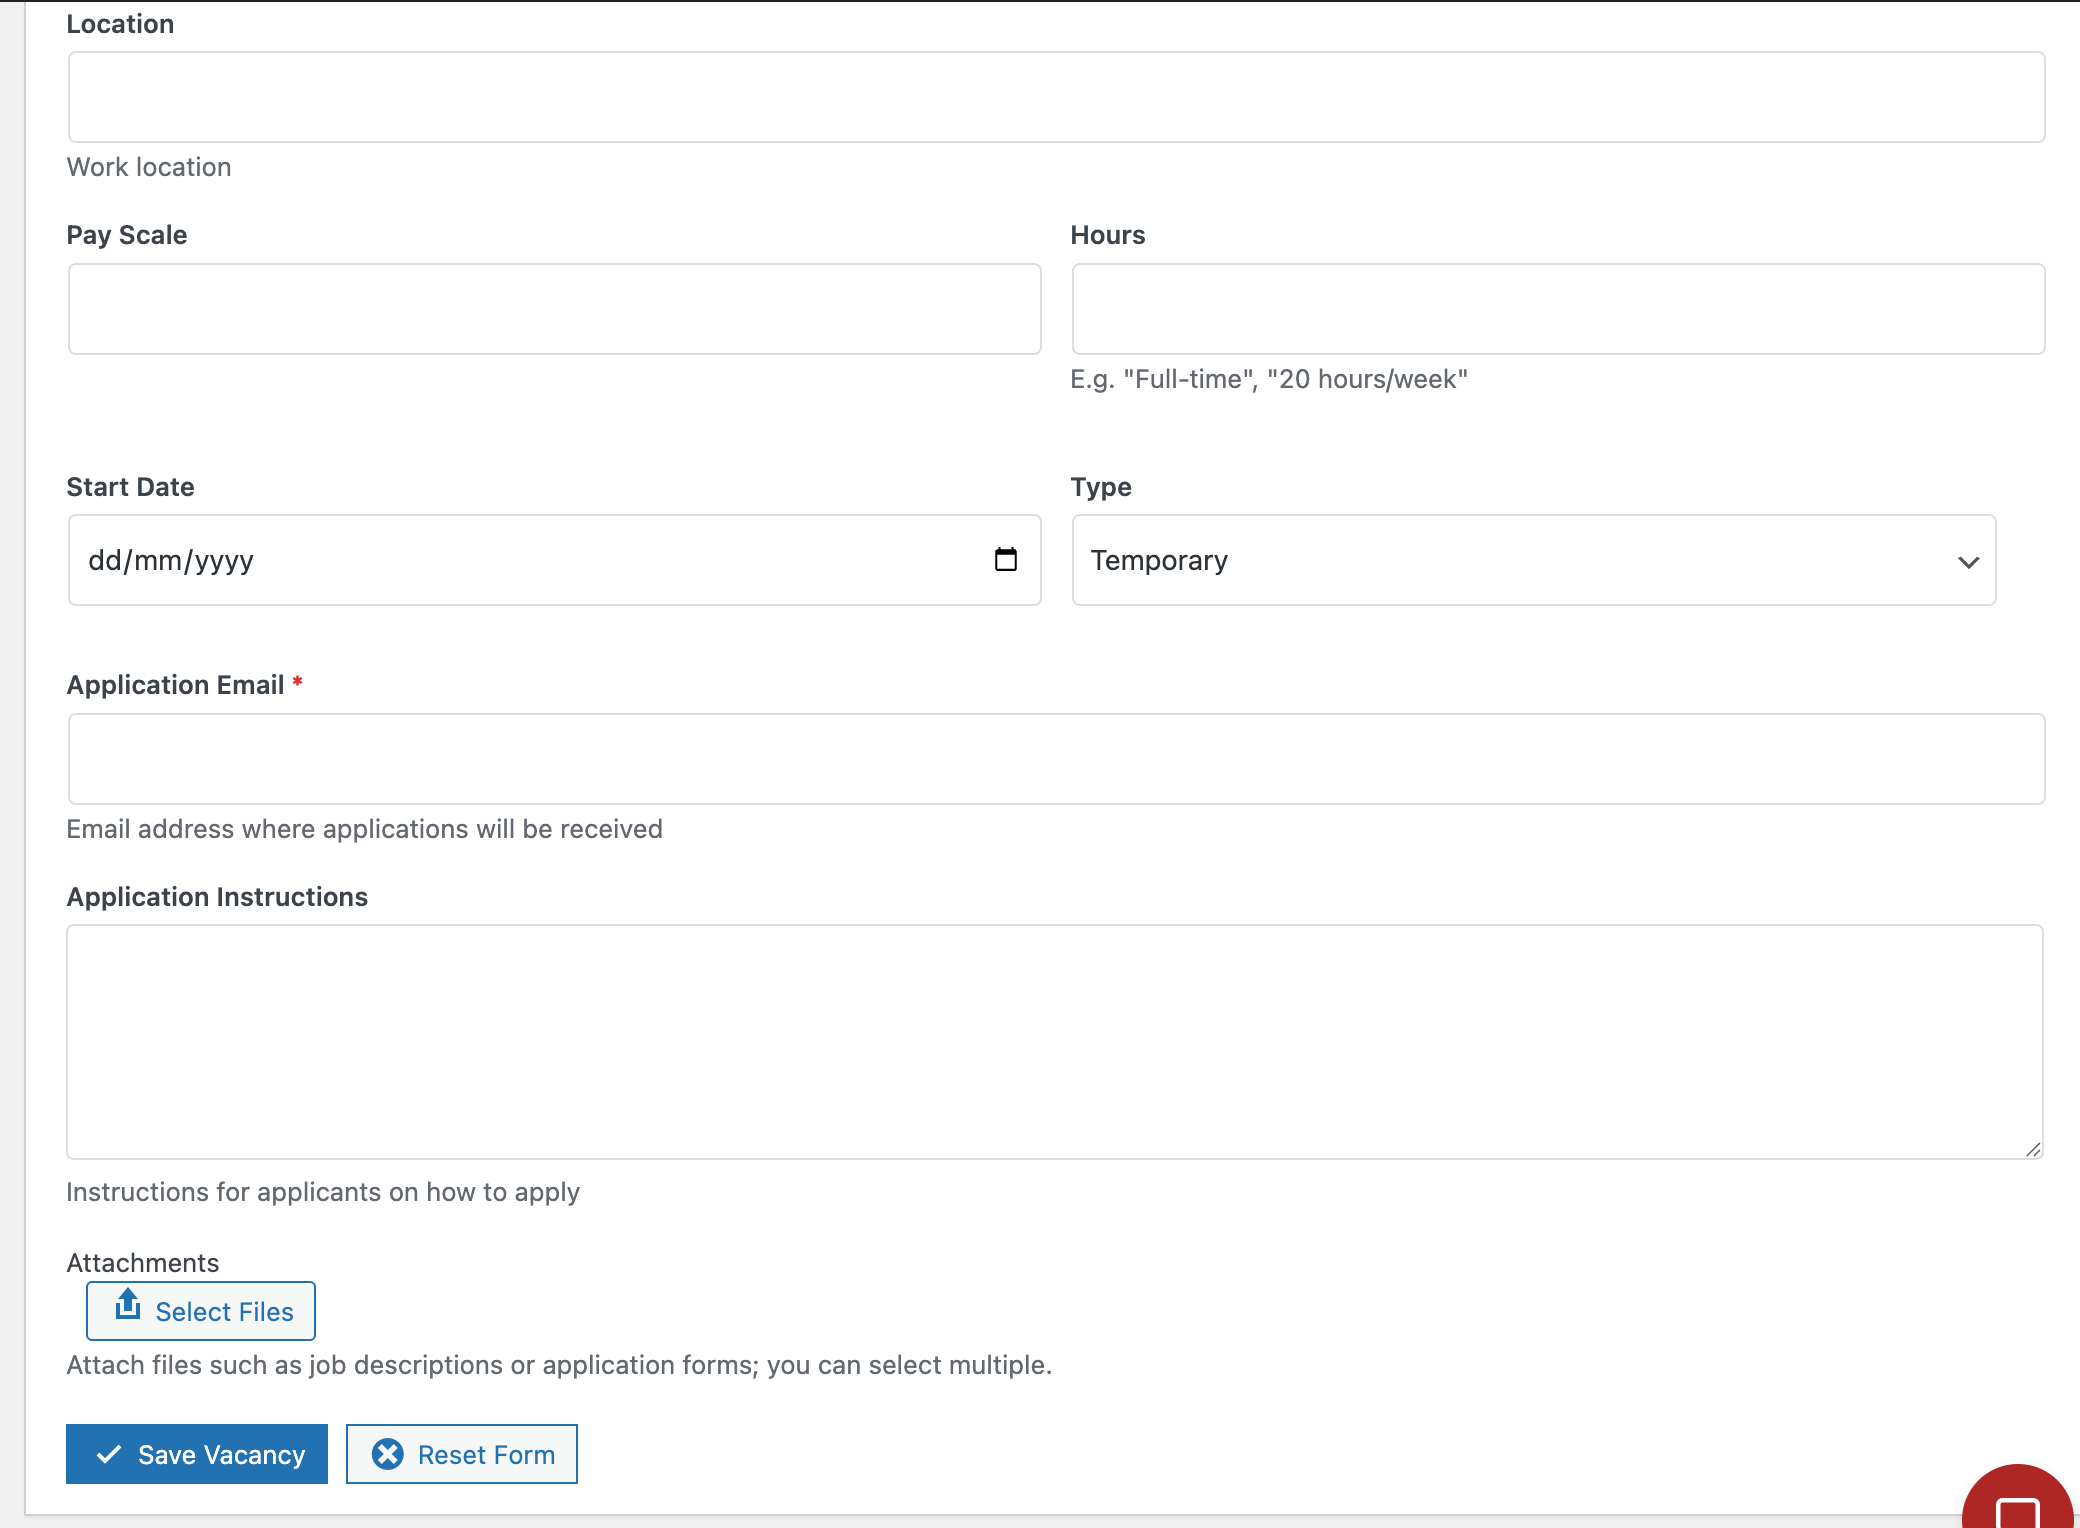
Field Descriptions
When creating or editing a vacancy, the following fields are available:
Field Description Required Position Job title or position name Yes Description Detailed job description with formatting options Yes Application Deadline Last date for submitting applications Yes Application Opens Date Date when applications start being accepted Yes Location Work location No Pay Scale Salary information or pay grade No Hours Working hours (e.g., "Full-time", "20 hours/week") No Start Date Expected job start date No Type Contract type (Temporary or Permanent) Yes Application Email Email address where applications will be received Yes Application Instructions Instructions for applicants on how to apply No Attachments Files such as job descriptions or application forms No
Shortcodes Guide
Available Shortcodes
The plugin provides two shortcodes for displaying vacancies on your site:
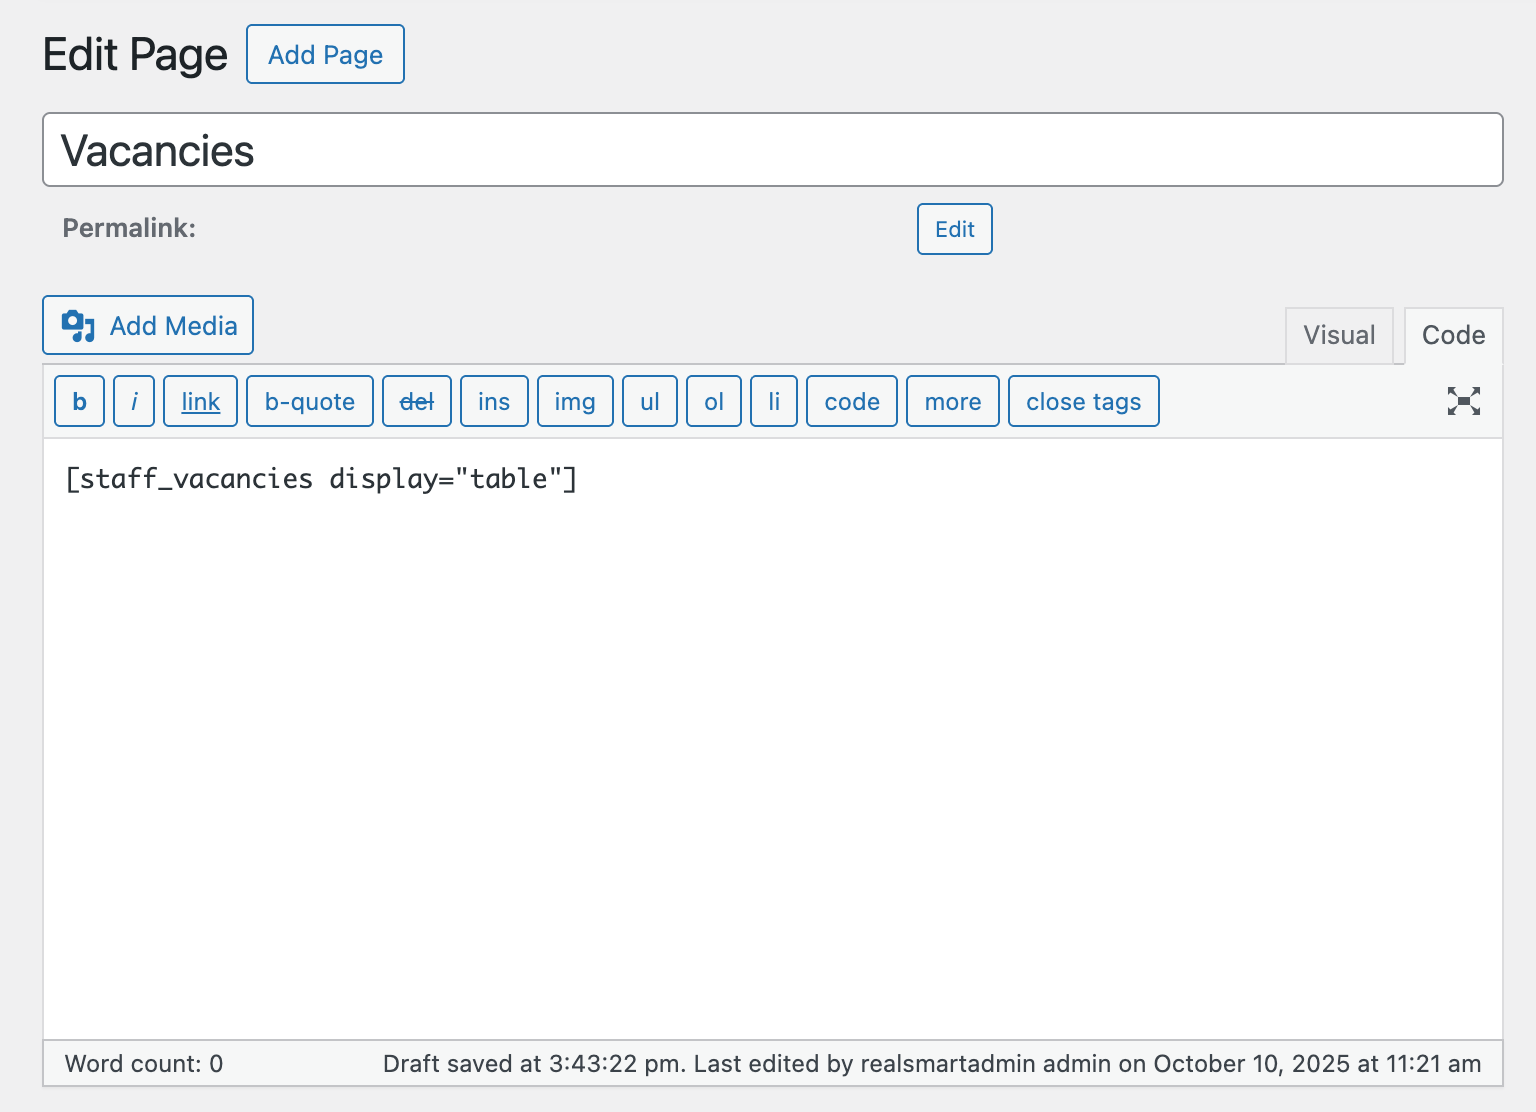
[staff_vacancies]- Displays a list of all current vacancies[staff_vacancy]- Displays a single vacancy with detailed information
staff_vacancies Shortcode
The [staff_vacancies] shortcode displays a list of all current vacancies that haven't passed their deadline.
Parameters
Parameter Description Default Example display Current option is Table n/a display="table" count Number of vacancies to display all 200
Example
[staff_vacancies display="table"]
This will display available vacancies in a table format.
staff_vacancy Shortcode
The [staff_vacancy] shortcode displays a single vacancy with detailed information.
Parameters
Parameter Description Required Example id The ID of the vacancy to display Yes id="abc123"
Example
[staff_vacancy id=<span class="hljs-string">"abc123"</span>]
This will display the detailed information for the vacancy with ID "abc123".
Examples
Example 1: Display all vacancies in card format
[staff_vacancies display="table"]
Example 2: Display 3 vacancies in table format
[staff_vacancies display="table" count=<span class="hljs-string">"3"</span>]Example 4: Display a specific vacancy
[staff_vacancy id=<span class="hljs-string">"abc123"</span>]
Best Practices
Keep information up-to-date: Regularly review and update vacancy information to ensure accuracy.
Set appropriate deadlines: Always set an application deadline to ensure vacancies don't display indefinitely.
Use descriptive titles: Make position titles clear and descriptive to help applicants find relevant opportunities.
Provide complete information: Fill in all relevant fields to give applicants a complete picture of the job.
Attach relevant documents: Use the attachments feature to provide detailed job descriptions, application forms, or other relevant documents.
Use the copy feature: When creating similar vacancies, use the copy feature to save time and ensure consistency.
Test your shortcodes: After adding shortcodes to your pages, preview them to ensure they display correctly.
Consider display options: Choose between card and table views based on the number of vacancies and the amount of information you want to display.
Set the open date and deadline: By setting the open and deadline dates, job roles will be filtered for the end users to what is currently an active vacancy on the list vacancies page.
Create a specific page called "Vacancies": By creating this page and inserting the staff_vacancies shortcode, you have a single page for prospective employees to visit to apply for a vacancy.