Apple School Manager — MAT Sync & Scheduled Runs
This section replaces the old external guide and documents how to run Apple School Manager (ASM) syncs across multiple schools in your MAT from within ADAdmin, including daily scheduled runs.
Where to find it
MAT Apple Sync UI: Admin > MAT > Apple Sync
Direct URL:
/mat/sync/applePer‑school Apple settings: Admin > Apple > General Settings (
/admin/apple/general-settings)
Overview of tabs
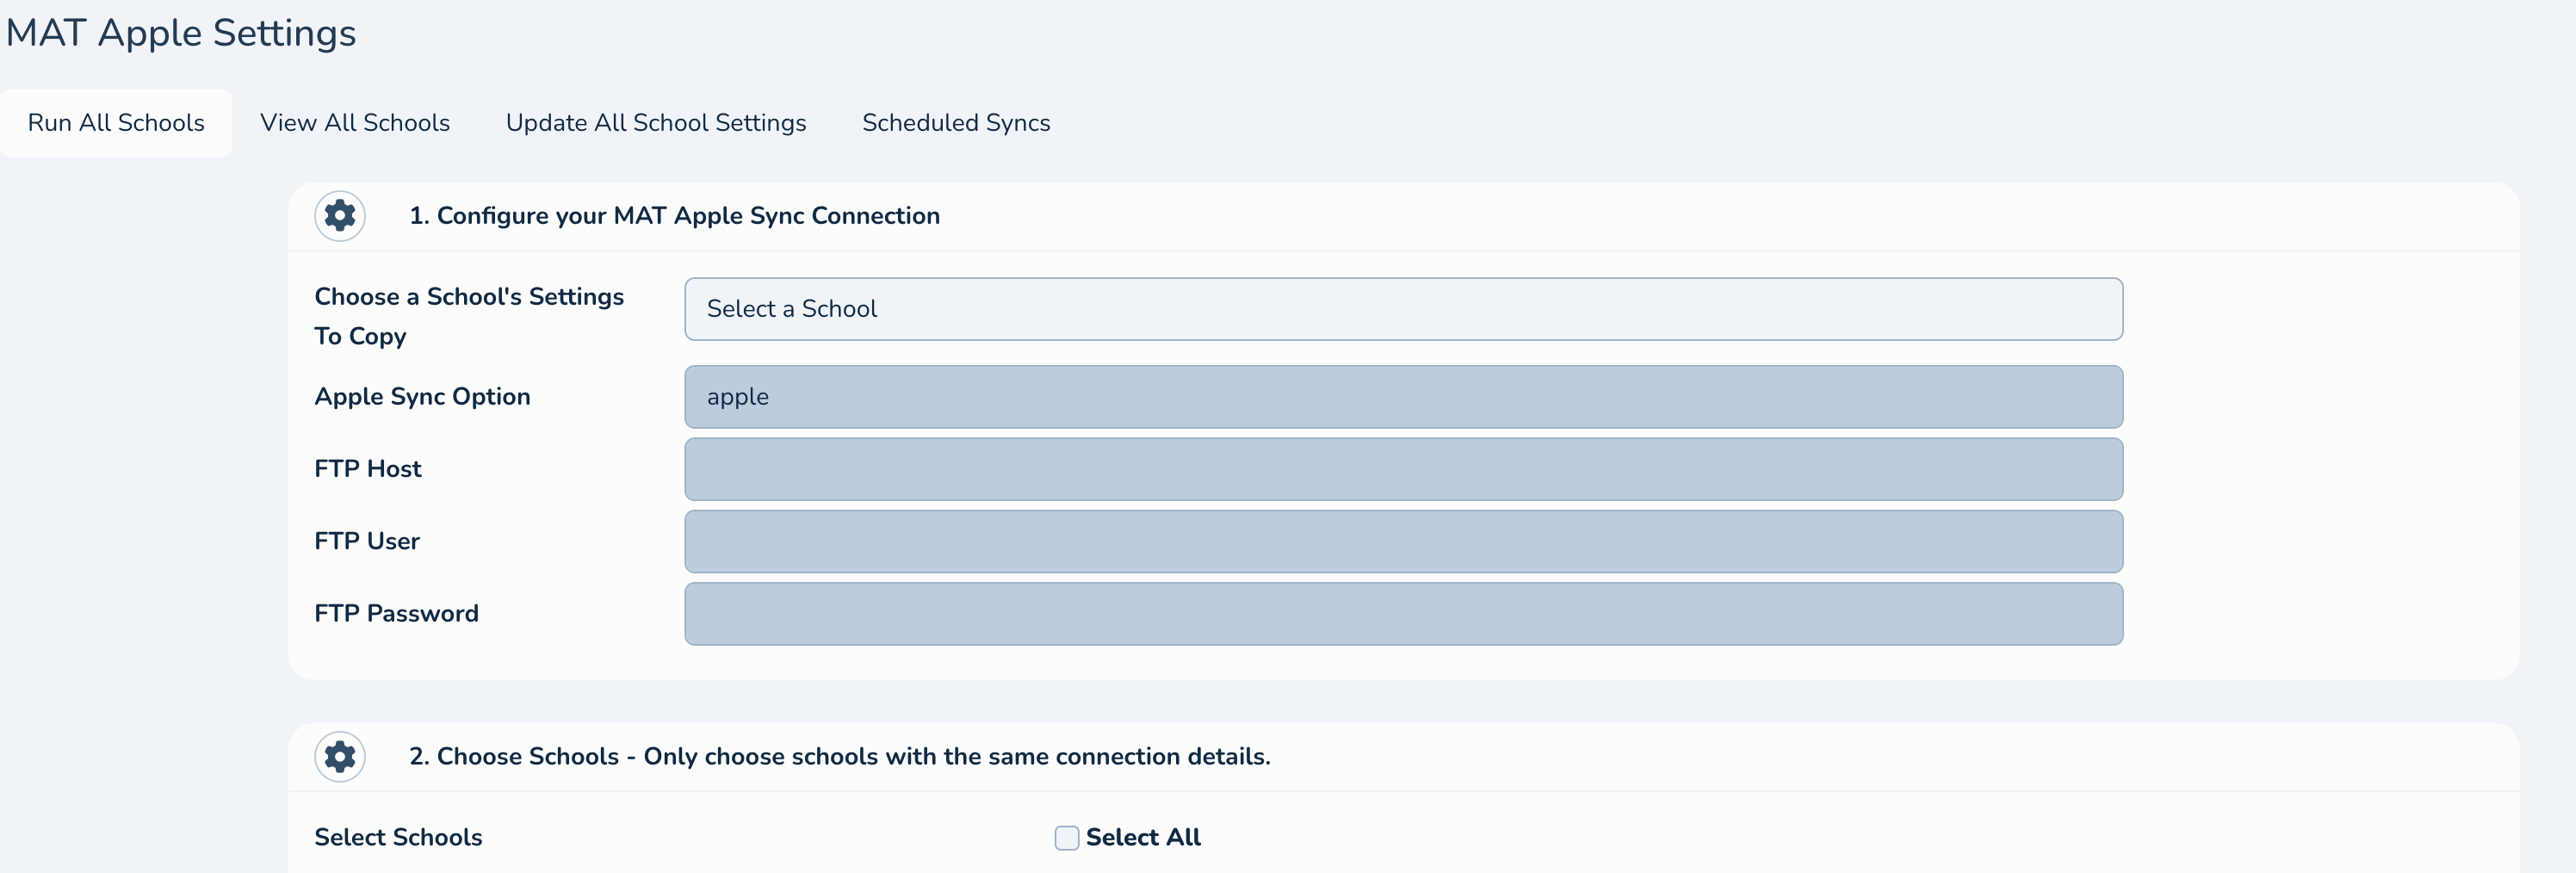
Run All Schools
Configure a MAT run by copying FTP credentials from one “template school”, pick the schools to include, generate a combined ZIP, and upload to ASM.
View All Schools
Manage Apple connection settings per school, generate individual ZIPs, test SFTP connectivity, and upload a single school to ASM.
Update All School Settings
Apply the same Apple connection settings to every school in your MAT in one action, including enabling/disabling Apple Sync.
Scheduled Syncs
See which schools are scheduled for a daily sync, disable individual schedules, and view the MAT combined schedule status.
Per‑school Apple settings (single school)
Use this when configuring or running a single school rather than a combined MAT run.
Steps
Enable Apple Sync and Scheduling
Go to: Admin > Apple > General Settings
Set
Enable Apple Syncto Enabled if you want this school to participate in Apple syncs.Optional: Set
Scheduled Syncto On to run an automatic daily sync at 02:00 server time for this school.
Enter Apple SFTP details
Fields:
Apple Sync Option,FTP Host,FTP User,FTP Password
Generate CSVs and check your ZIP
Click
Generate a new CSVto build a fresh ZIP.If a ZIP exists, the page will show the last modified time and offer a
Download ZIP & Check Your Datalink.
Test SFTP connectivity
Click
Check Connectionto verify credentials can connect to Apple’s SFTP.
Upload to Apple School Manager
When a ZIP exists and SFTP is connected, click
Upload to ASM.Files are uploaded to the ASM dropbox path
/dropbox/Archive.zip.
Notes
ZIP storage path pattern (internal):
apple/{sc_id}/apple/apple.zip
MAT Apple Sync — combined run across schools
Use this when you want to produce a single, combined export and upload for multiple schools in your MAT.
Choose a template school (copy credentials)
Tab: Run All Schools
Step 1:
Choose a School's Settings To CopySelect a school. Its Apple settings are shown read‑only and used as the template (FTP Host/User/Password and Apple Sync Option).
Select schools to include
Step 2:
Choose Schools— tick one or more schools in your MAT.Important: Only select schools that use the same FTP Password. The UI will prevent a run if selected schools have mixed passwords.
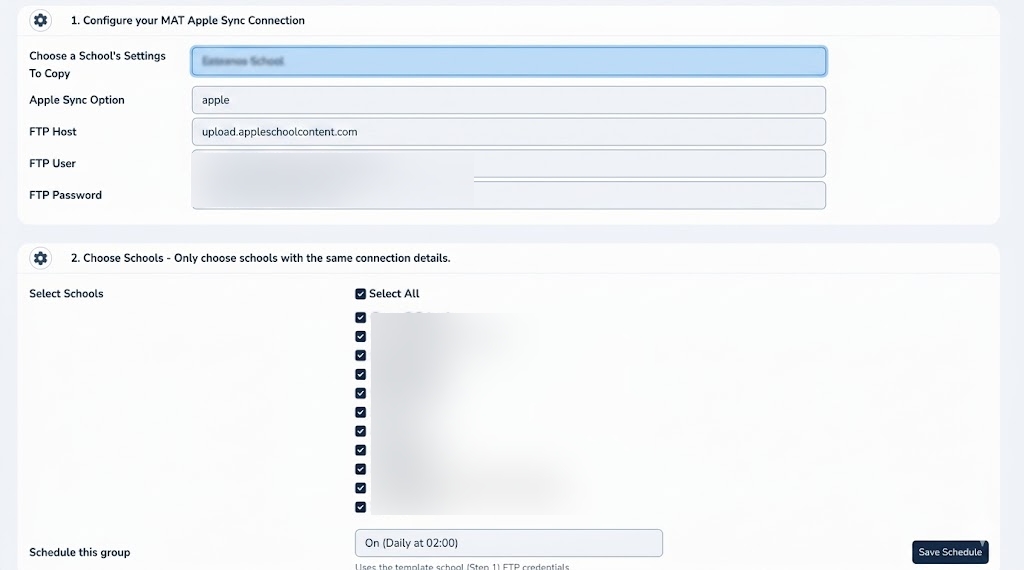
A
Select Allcheckbox is available; ADAdmin will keep it in sync with your selections.
Generate MAT CSVs and ZIP
Click
Generate a new CSV.If successful, you’ll see a success message. Internally, the combined ZIP is written under:
apple/{mat_context_sc_id}_mat_sync/apple/apple.zip
Test the MAT SFTP connection (optional but recommended)
Click
Check Connectionin the Run All Schools tab’s connection section. This verifies the template school’s credentials (host/user/password) can connect.
Upload the MAT ZIP to Apple School Manager
Click
Upload to ASM. The combined ZIP is uploaded to/dropbox/Archive.zipusing the template school’s credentials.
Tips
The
Apple Sync Optionlist is driven byconfig('apple_sync.options').If the combined ZIP isn’t detected after generation, you’ll see
MAT CSVs could not be generated correctly.
Update All School Settings (bulk apply)
Tab: Update All School Settings
Set
Enable Apple Syncfor all schools at once and supplyApple Sync Option,FTP Host,FTP User, andFTP Password.Click
Apply These Settings To All Of My Schoolsto persist across the MAT.
View All Schools (per‑school actions within MAT view)
For each school card you can:
Enable/disable Apple Sync for that school.
Edit Apple FTP settings.
Generate a new CSV/ZIP and see last modified time.
Test SFTP connectivity.
Upload that school’s ZIP to ASM.
Scheduled syncs
There are two scheduling views/features surfaced in ADAdmin:
Per‑school daily schedule
Location: Admin > Apple > General Settings
Field:
Scheduled Sync→ OnBehavior: When on, that school will run an Apple sync every day at 02:00 server time.
In the MAT > Apple Sync > Scheduled Syncs tab, scheduled schools are listed under “Schools scheduled for daily sync (02:00)”. Use the
Disablebutton to turn off scheduling for an individual school.
MAT combined scheduled run
Location: MAT > Apple Sync > Scheduled Syncs
Shows the current status of a MAT combined schedule (if any):
Enabled/Disabled
Number of selected schools to include
Template school ID in use for credentials
Controls:
Disable MAT Schedule— turns off the combined schedule if it’s currently enabled.To create or update a MAT combined schedule: in the Run All Schools tab, choose a template school and select your schools; then use the schedule controls provided by your deployment (when present) to save the MAT group. Internally, ADAdmin stores this under
scheduledMatGroupinsc_apple_sync_settingswith fields:enabled,schoolIds,templateSchoolId.
Execution time: 02:00 server time, same daily window as per‑school runs.
Notes and constraints
A template school is required when enabling a MAT combined schedule so the correct FTP credentials are used.
At least one school must be selected for the MAT combined schedule.
A school must have Apple Sync enabled to be considered for scheduling and to appear in the scheduled list.
Troubleshooting
Can’t connect to Apple SFTP
Use
Check Connectionin either the per‑school or MAT Run All Schools tab and review the error message.Verify
FTP Host,FTP User, andFTP Password.
MAT CSVs not generating
Ensure you selected only schools that share the same FTP Password.
Confirm a template school is selected.
Upload succeeds but data doesn’t appear in ASM
Confirm that
/dropbox/Archive.zipexists post‑upload.Download the ZIP from ADAdmin and spot‑check CSV contents for expected users/classes.
School not appearing under Scheduled Syncs
Ensure Apple Sync is enabled for that school and
Scheduled Syncis On in per‑school settings.For MAT combined schedule, ensure the school is in the saved
schoolIdslist and that the schedule is enabled.

Reference paths and actions (for admins)
Per‑school ZIP path:
apple/{sc_id}/apple/apple.zipMAT combined ZIP path:
apple/{ctx_sc_id}_mat_sync/apple/apple.zipASM upload path:
/dropbox/Archive.zipLivewire component:
App\Livewire\Mat\Sync\AppleSyncRelated views:
resources/views/livewire/mat/sync/apple-sync.blade.phpand partials underresources/views/mat/apple-sync/