Key features
Manage a list of policy files in one place (CPT: Policy Manager)
Friendly display names independent from file names
Copy‑paste shortcode for embedding on any page
Optional cross‑site sharing: publish a Policy Group from Site A and display it on Site B using a per‑group key (great for MATs)
Remote rename capability for consumer sites (display name only)
Per‑file Advanced settings:
Note (free text stored with the file)
Reminder month and day, with frequency: None, Annually, Every 6 months, Quarterly, Monthly
Recipient emails (comma‑separated) for reminder notifications
Send Test Email button per file
Automatic reminder emails on the chosen date(s) with Policy Group name, Document name, file link, and any notes
Audit trail records add/remove/rename/replace, Advanced updates, and Test Email sends
Sorting options
Frontend shortcode: order by Display name (default), File name, Reminder date, or Date added
Admin metabox: instant client‑side sorting with the same criteria
1. Overview
The Smart Policies Plugin lets you organise, group, and display policy documents with searchable, easy‑to‑embed lists.
New: You can set per‑file reminders and recipients, add notes, send test emails, and track all changes in an Audit Trail. Sorting is available on both the frontend and in the admin editor.
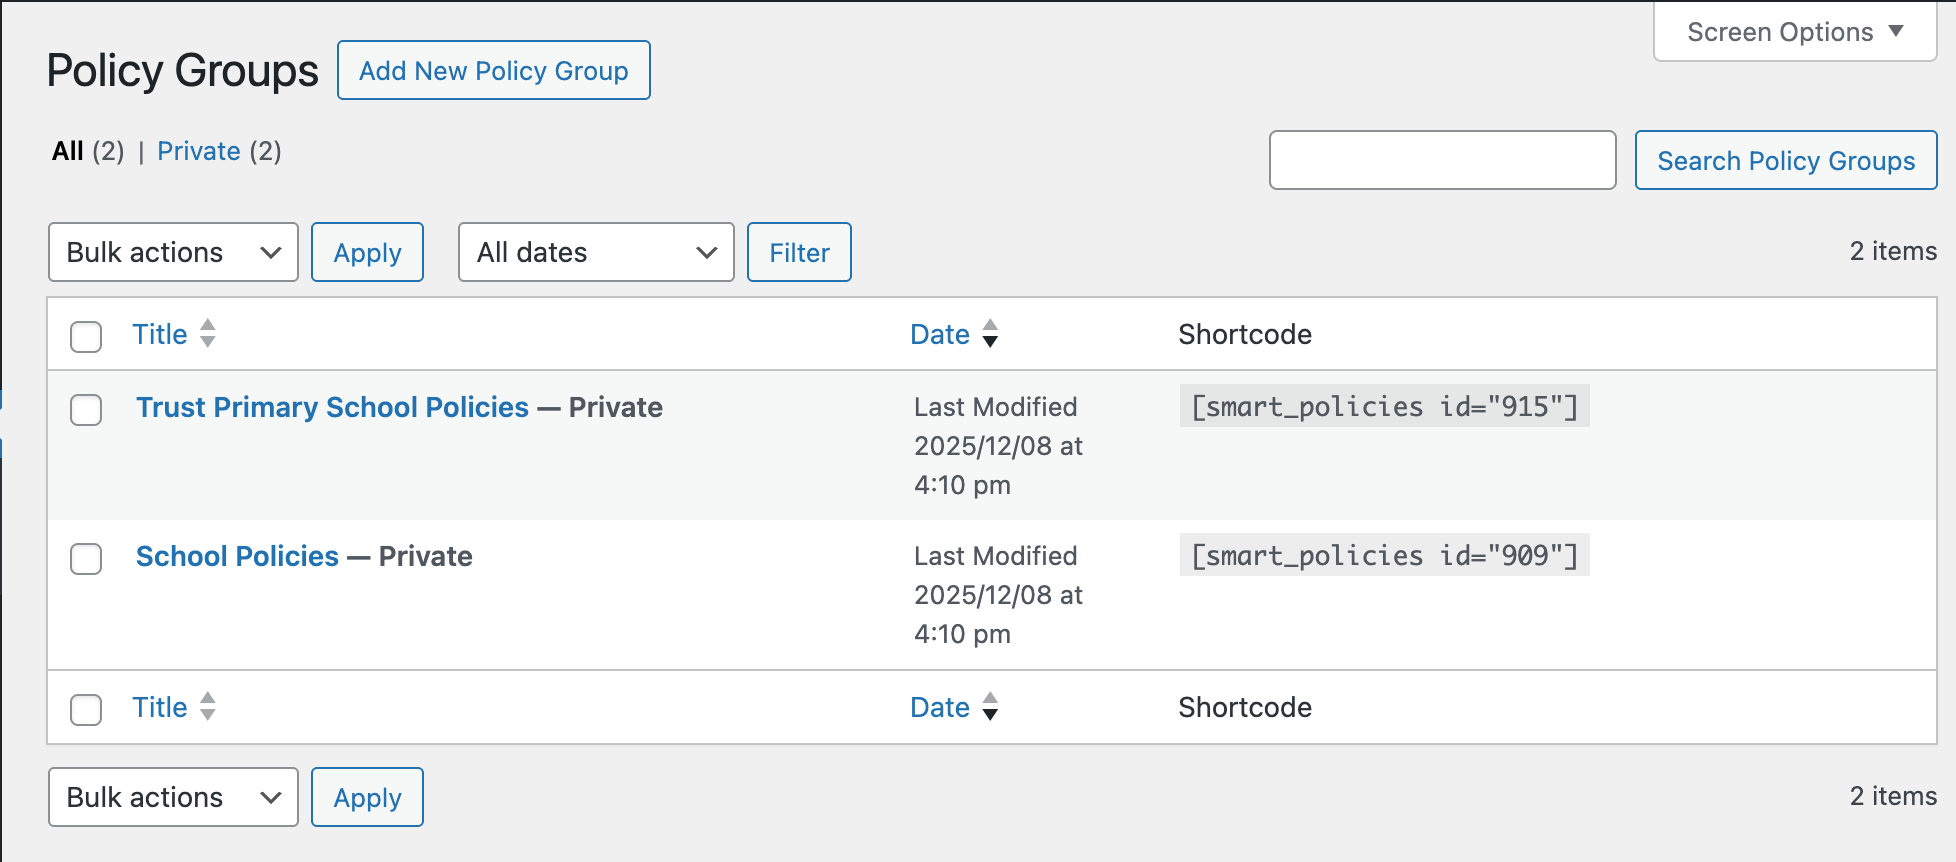
2. Creating a Policy Group
Ensure the plugin "Smart Policies Plugin" is enabled in Plugins.
Go to Policy Manager in the left‑hand WordPress admin menu.
Click Add New Policy Group.
Enter a Title (e.g., "HR Policies 2024" or "Health & Safety").
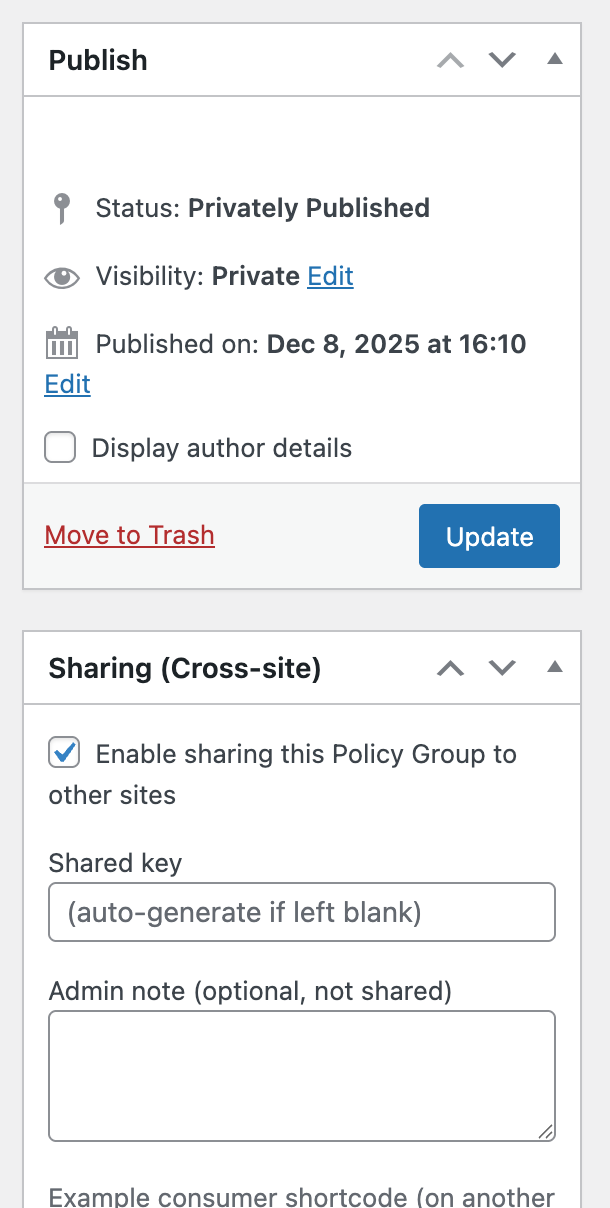
Visibility: New groups default to Private and are typically embedded with a shortcode.
3. Managing Files
Open any Policy Group and locate the Policy Group Files box.
Adding files
Click the
Add FilesbuttonChoose from the Media Library or upload new files, then click
SelectFiles are referenced by URL (no re‑upload, keeping storage efficient)
Display names
"Display Name" defaults to the file name
Change it in the text box and click
Save Name
Advanced settings per file
Click Advanced on a file row to open the editor:
Note: Optional free text (e.g., context for reviewers)
Reminder:
Month (1–12)
Day (1–31; automatically normalised for short months)
Frequency:
None,Annually,Every 6 months,Quarterly, orMonthly
Recipients: Comma‑separated email addresses that will receive reminders
Actions:
Save Advancedto persist these fieldsSend Test Emailto immediately send a preview to the typed recipientsCancelto close the editor
What goes in the reminder email
Policy Group name
Document display name (or file name)
Notes (if provided)
Direct link to the document
Audit Trail
Any Advanced save is logged as
adv_updatewith a summary of changesTest emails are logged as
test_emailwith the recipient list
Replace or remove a file
Replaceswaps the binary (keeps the entry and its Display Name/Advanced fields)Removedeletes the entry from this group only (does not delete from the Media Library)
Admin‑side ordering controls
Above the files table, choose:
Order by: Display name (default), File name, Reminder date (Month/Day), or Date added
Direction: Ascending/Descending
Notes
Sorting is instantaneous and persists per post in your browser (localStorage)
Reminder sort key is
month*100 + day(e.g., Mar 15 → 315)Items without a reminder appear at the end in ascending order, at the start in descending; ties fall back to Display name, then File name
Sorting reapplies automatically after uploads, replace, Advanced save, and Save Name
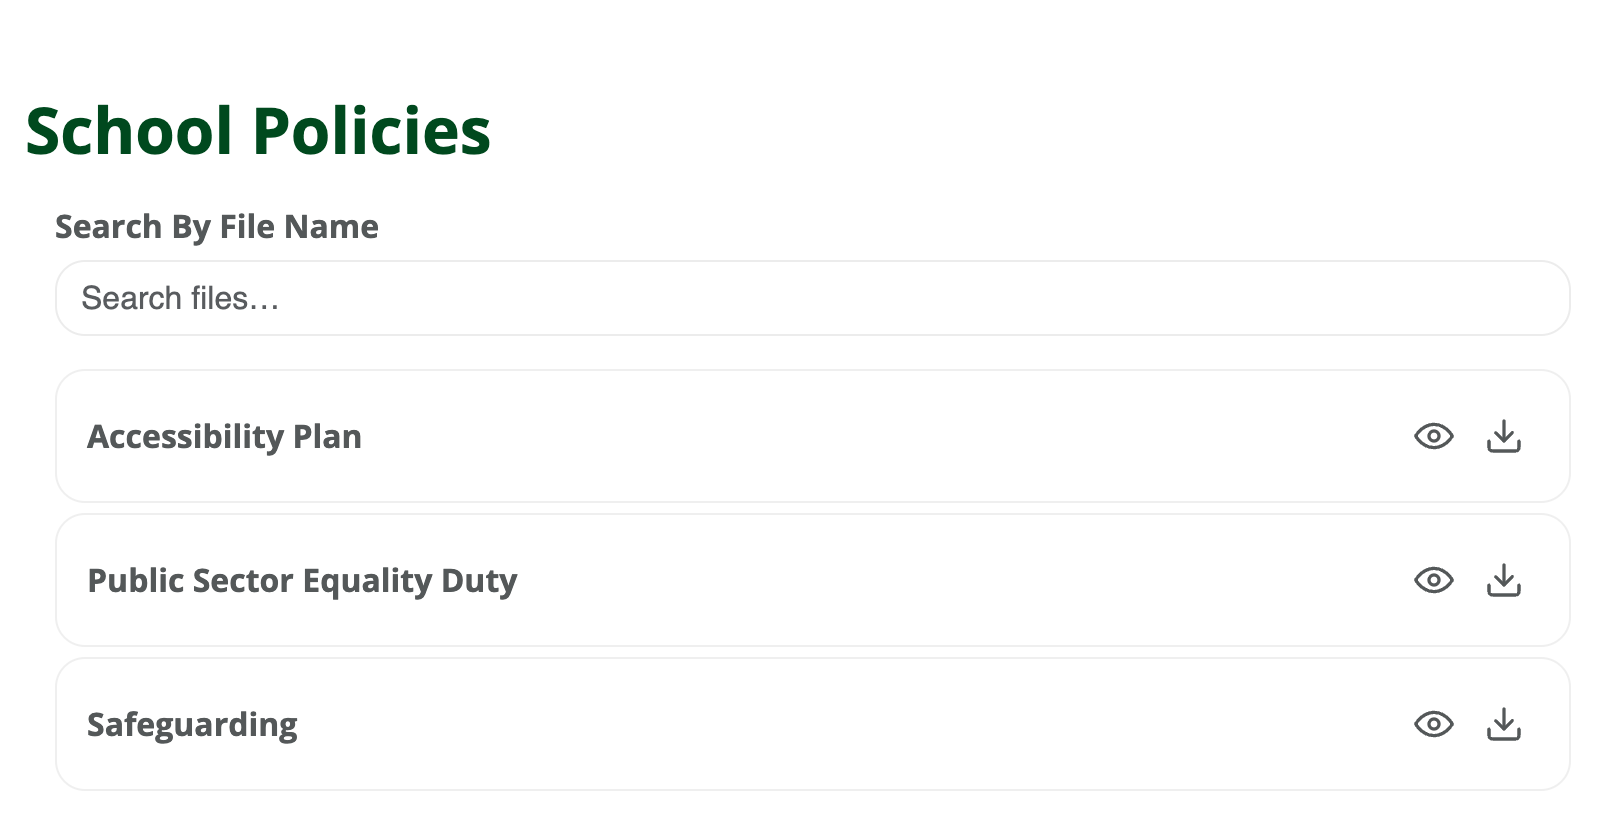
4. Displaying the Policies (Shortcode)
Copy the shortcode from the metabox and paste it into a page or post:
JavaScript[smart_policies id="123"]Shortcode attributes
id(required for local groups)show_title(true|false, default false): show the Policy Group titleorderby(name|file|reminder|added, default name)order(asc|desc, default asc)class(string): custom CSS classes on the wrapper
Examples
JavaScript[smart_policies id="45" show_title="true"]
[smart_policies id="45" orderby="file" order="asc"]
[smart_policies id="45" orderby="reminder" order="asc"]
[smart_policies id="45" orderby="added" order="desc"]
Notes on ordering
name: by Display name (fallback to file name)file: by actual file namereminder: by reminder Month/Day; items without reminders sorted last (asc) or first (desc)added: by upload date
5. Sharing a Policy Group to Other Sites
Use this when your site owns the list of policies and other sites should consume it.
Open the group and find the "Sharing (Cross‑site)" metabox
Tick
Enable sharing this Policy Group to other sitesLeave
Shared keyblank to auto‑generate, or enter your own and Save/UpdateCopy the example consumer shortcode shown in the metabox:
JavaScript[smart_policies source_url="https://owner-school.example" remote_id="10095" key="YOUR_GENERATED_KEY" show_title="true"]Security notes
The per‑group key is required for both reading and limited remote renaming (display name only); keep it private
You can rotate the key at any time (consumer sites must update their shortcode)
6. Consuming the Policy Group on Another Site
Two methods:
Paste the shortcode directly on a page
JavaScript[smart_policies source_url="https://owner-school.example" remote_id="10095" key="SHARED_KEY" cache_ttl="900" show_title="true"]Or save a Cross‑site Preview
Go to Policy Manager → Cross‑site Preview → Add Cross‑site Policy Group
Enter Label (optional), Source URL, Remote Group ID, and Key → Save
From the list: preview latest files, copy a ready‑made shortcode, or delete the saved entry
Caching & performance
cache_ttl(seconds) caches remote fetches (e.g.,900= 15 minutes)timeout(seconds) avoids slow pages if the owner site is unreachableEditors can bypass the preview cache using the "Refresh" button
7. Frontend Features
Live Search: instant filter by file name
Preview: click the Eye icon to open in a new tab
Ordering: the list respects your shortcode
orderbyandorderparameters
8. S3 and Storage Notes
Each site usually points to its own S3 bucket via environment variables
Consuming a remote group does not copy files between buckets; it references the original URLs (commonly via CDN)
File uploads happen on the owner site using its Media Library
9. Reminders and Troubleshooting
How reminders work (summary)
A daily WP‑Cron event (
spp_daily_cron) runs once per dayOn your chosen Month/Day, according to Frequency, the plugin emails the per‑file recipient list
No duplicate emails are sent within the same period (month/quarter/half‑year/year)
If reminders don’t arrive
Check that the file has Month, Day, Frequency (not
None), and at least one valid recipient emailUse
Send Test Emailin the Advanced editor to verify deliverabilityWP‑Cron runs on page hits; for reliability, configure a server cron to load
wp-cron.phpregularlyWith WP‑CLI:
wp cron event run spp_daily_cronto trigger immediately
Review the Audit Trail: look for
adv_updateandtest_emailentries
Other tips
“No files yet” after adding: click Update/Publish on the Policy Group
Remote errors: verify
source_url,remote_id,key; ensure sharing is enabled and the owner site is reachable over HTTPSChanges not appearing: wait for
cache_ttlto expire or setcache_ttl="0"; in Cross‑site Preview use “Refresh (bypass cache)”Consumer sites cannot add/remove files by design; they can rename display names when remote‑managed
10. Shortcode Reference
Local group (same site)
JavaScript[smart_policies id="123" show_title="true" orderby="name" order="asc"]Remote group (owner site is another domain)
JavaScript[smart_policies
  source_url="https://owner-school.example"
  remote_id="10095"
  key="SHARED_KEY"
  cache_ttl="900"
  timeout="10"
  show_title="true"
  orderby="name"
  order="asc"
]
Attributes
id(number): Local Policy Group post IDsource_url(string): Base URL of the owner siteremote_id(number): Policy Group ID on the owner sitekey(string): Shared key from the owner site’s Sharing boxcache_ttl(seconds, default 900): Remote cache duration;0disables cachetimeout(seconds, default 10): Remote fetch timeoutshow_title(true|false): Show the group title above the listorderby(name|file|reminder|added, default name): Sort criteriaorder(asc|desc, default asc): Sort directionclass(string): Additional CSS classes on the wrapper
If you’d like HTML email templates, fixed send time for reminders, or server‑side persistence of admin sorting (user meta), let us know and we can extend this further.