How can we help?
Get help straight from our team...
smartsync
Microsoft Entra Sync
Sync data from Realsmart to your Microsoft Entra instance.
Updated 2 weeks ago
Getting Setup
To get started, please get in touch, and we will switch the feature on for you, once we have set you up, you will see the following option in your Smartadmin navigation area Main Left hand Menu:
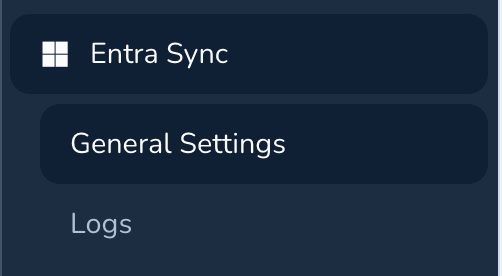
General Settings
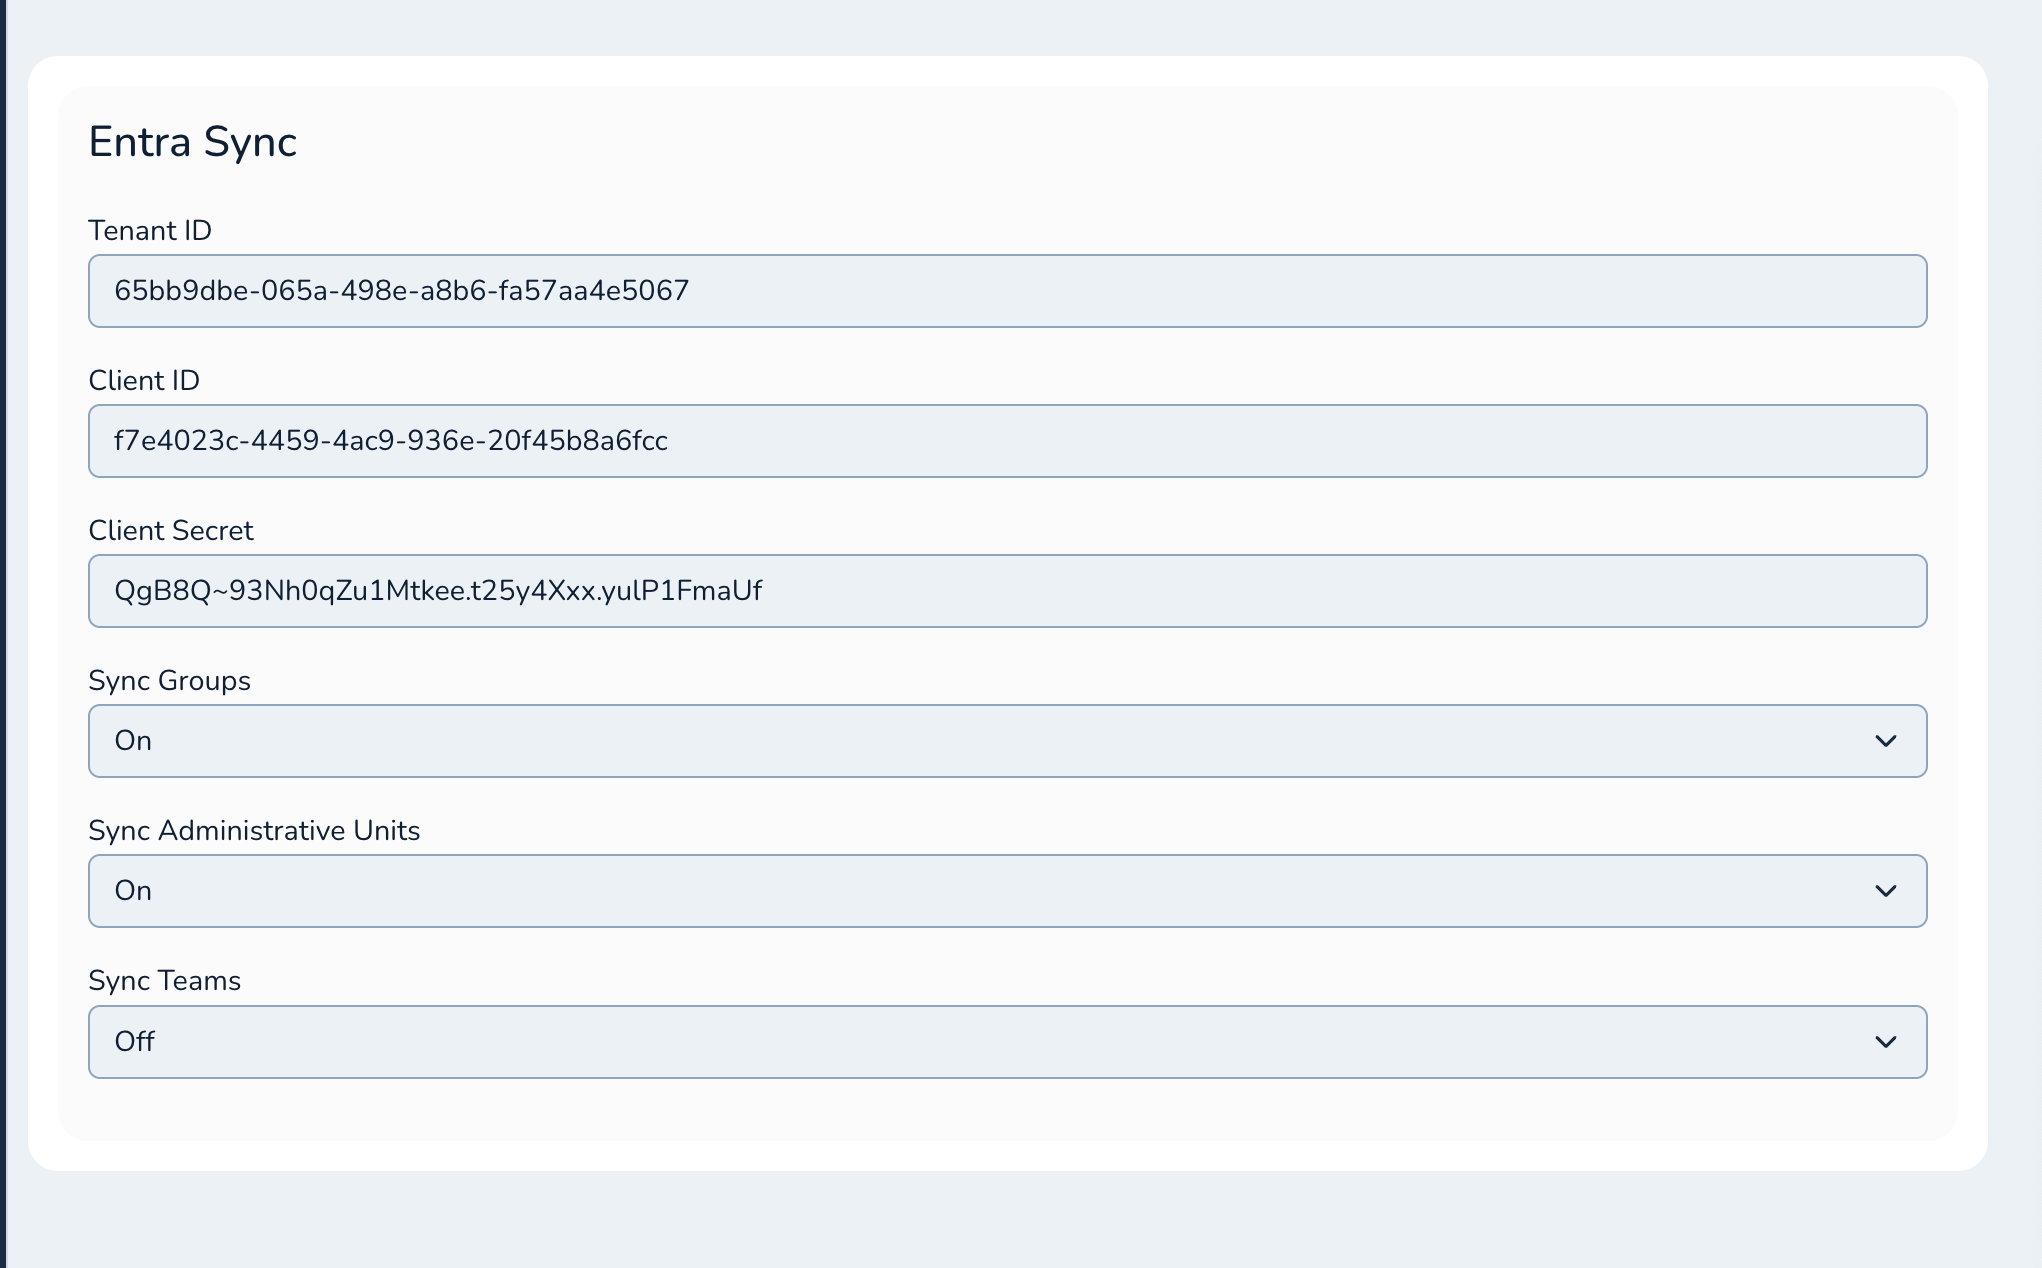
When you visit the General Settings area you will be presented with the following options to enter first:
Tenant ID
Client ID
Client Secret
These options are required to allow our codebase to communicate with your Entra instance. In order to get this information you will have to follow these steps:
To call Microsoft Graph, an app must obtain an access token from the Microsoft identity platform. This access token includes information about whether the app is authorised to access Microsoft Graph on behalf of a signed-in user or with its own identity. This article provides guidance on how an app can access Microsoft Graph with its own identity, also called app-only access.
Create an Application
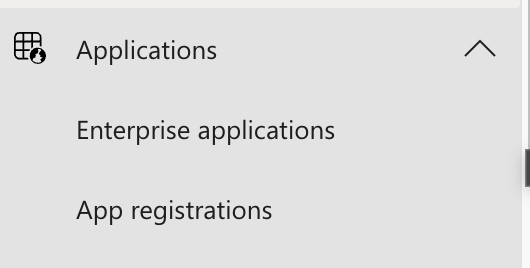
Select the "Applications" drop down on the left of your admin centre, then select "App registrations", and then select "New registration":

Under "Name" put "Realsmart Entra Sync", and select either Single tenant, or multitenant (first 2 options):
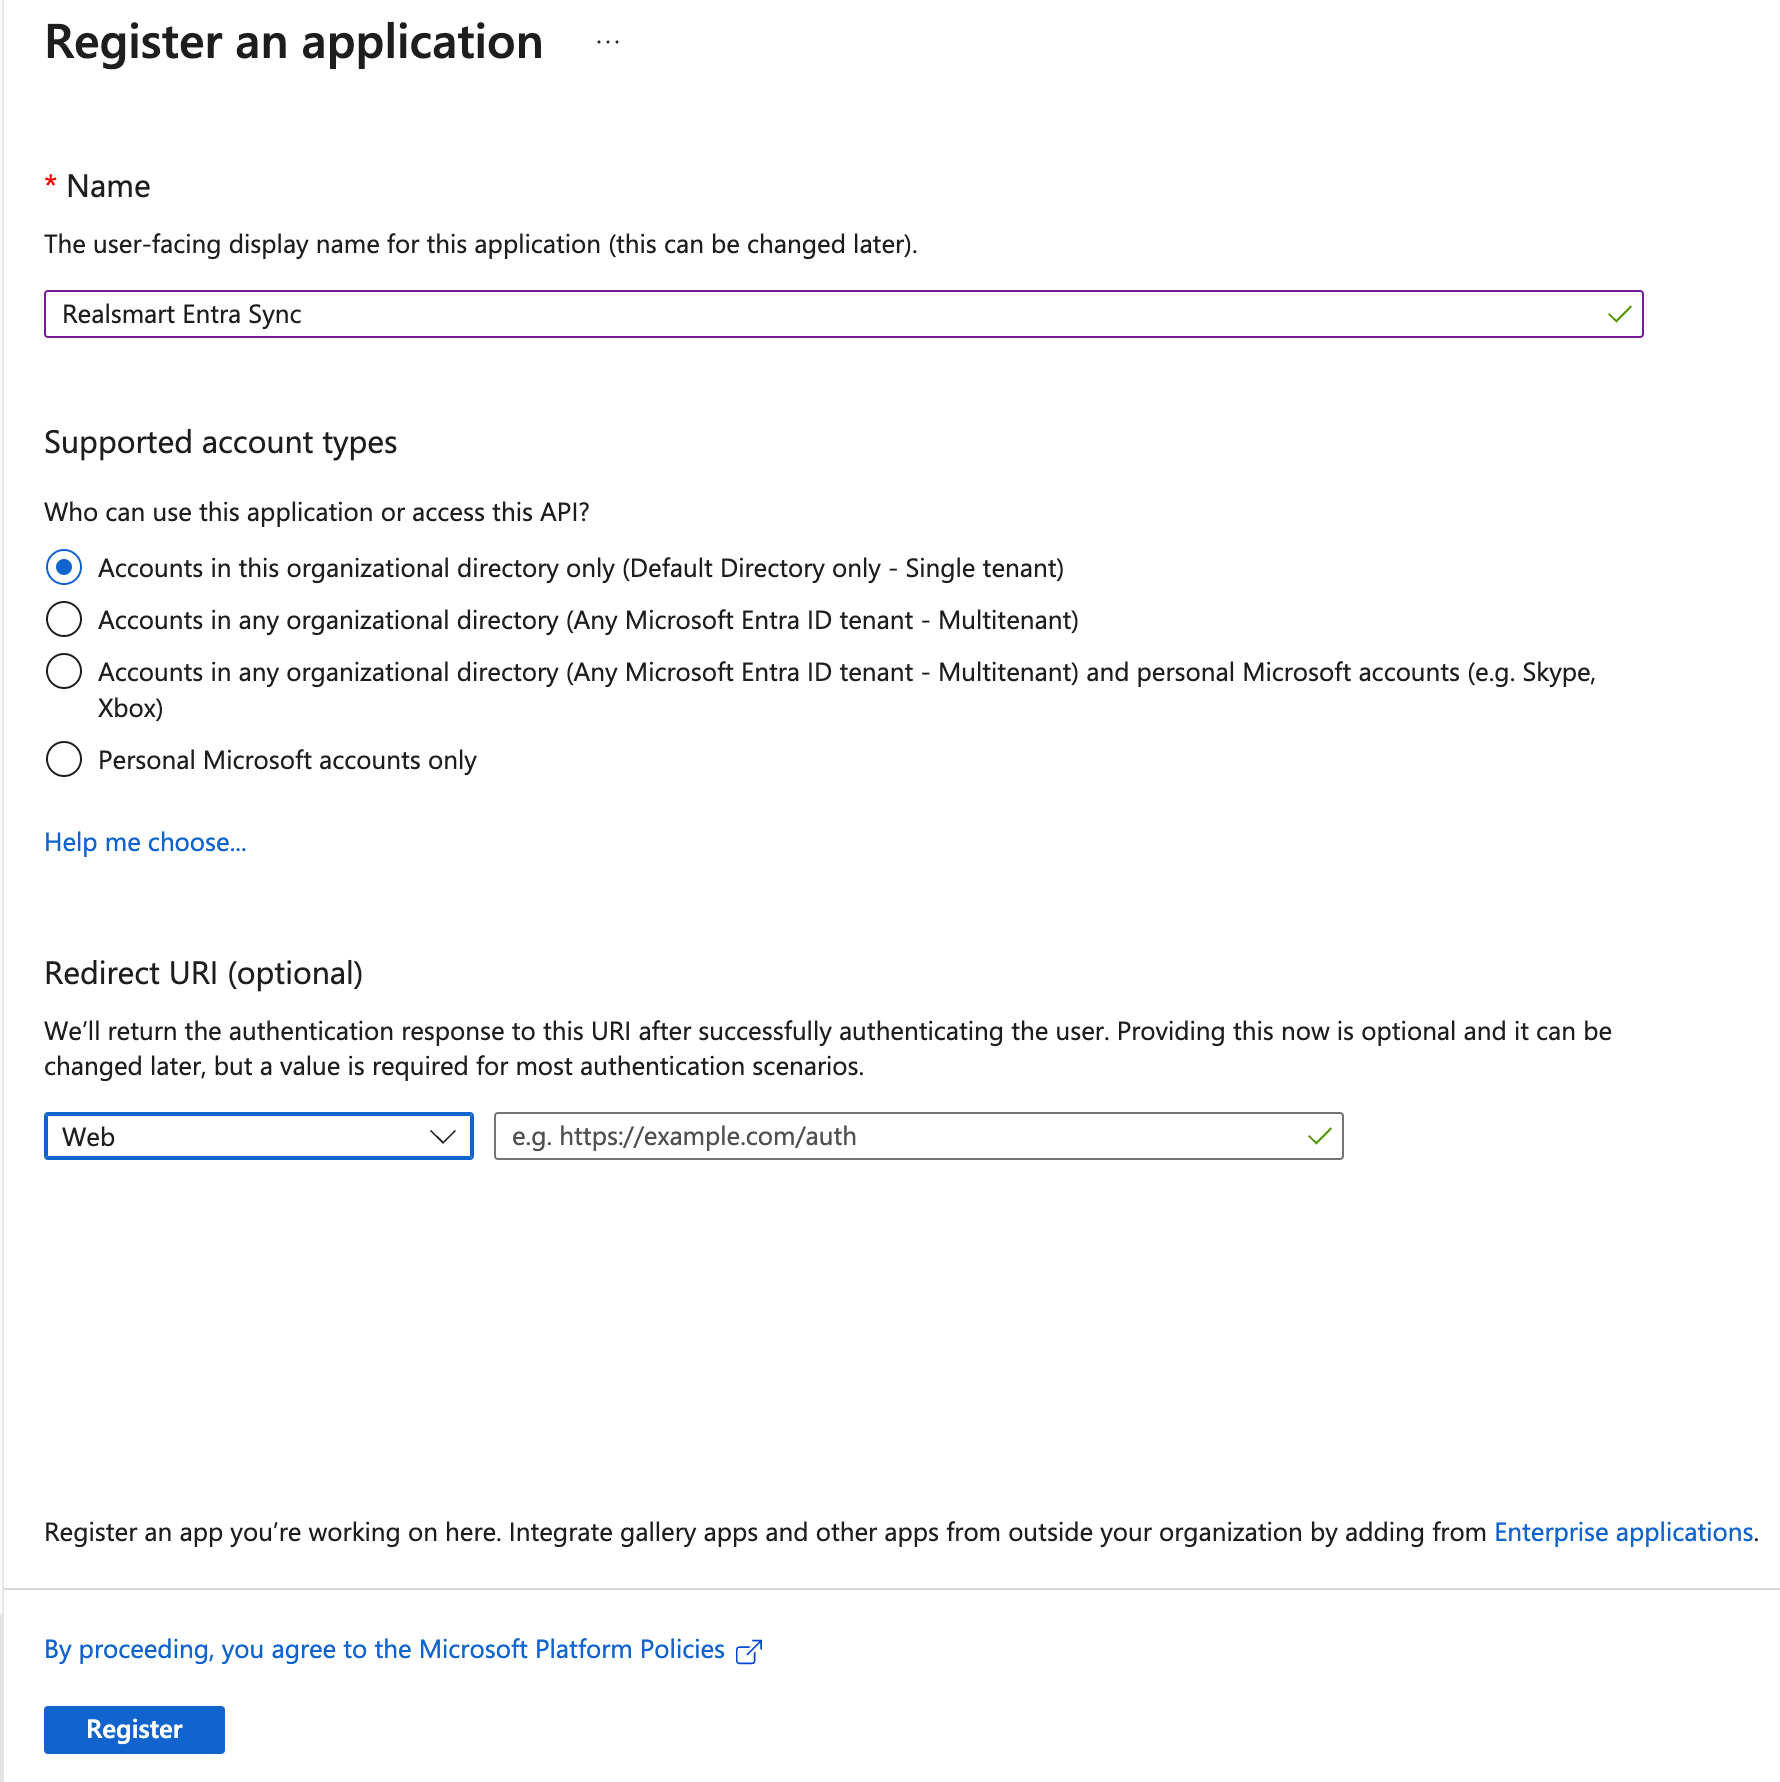
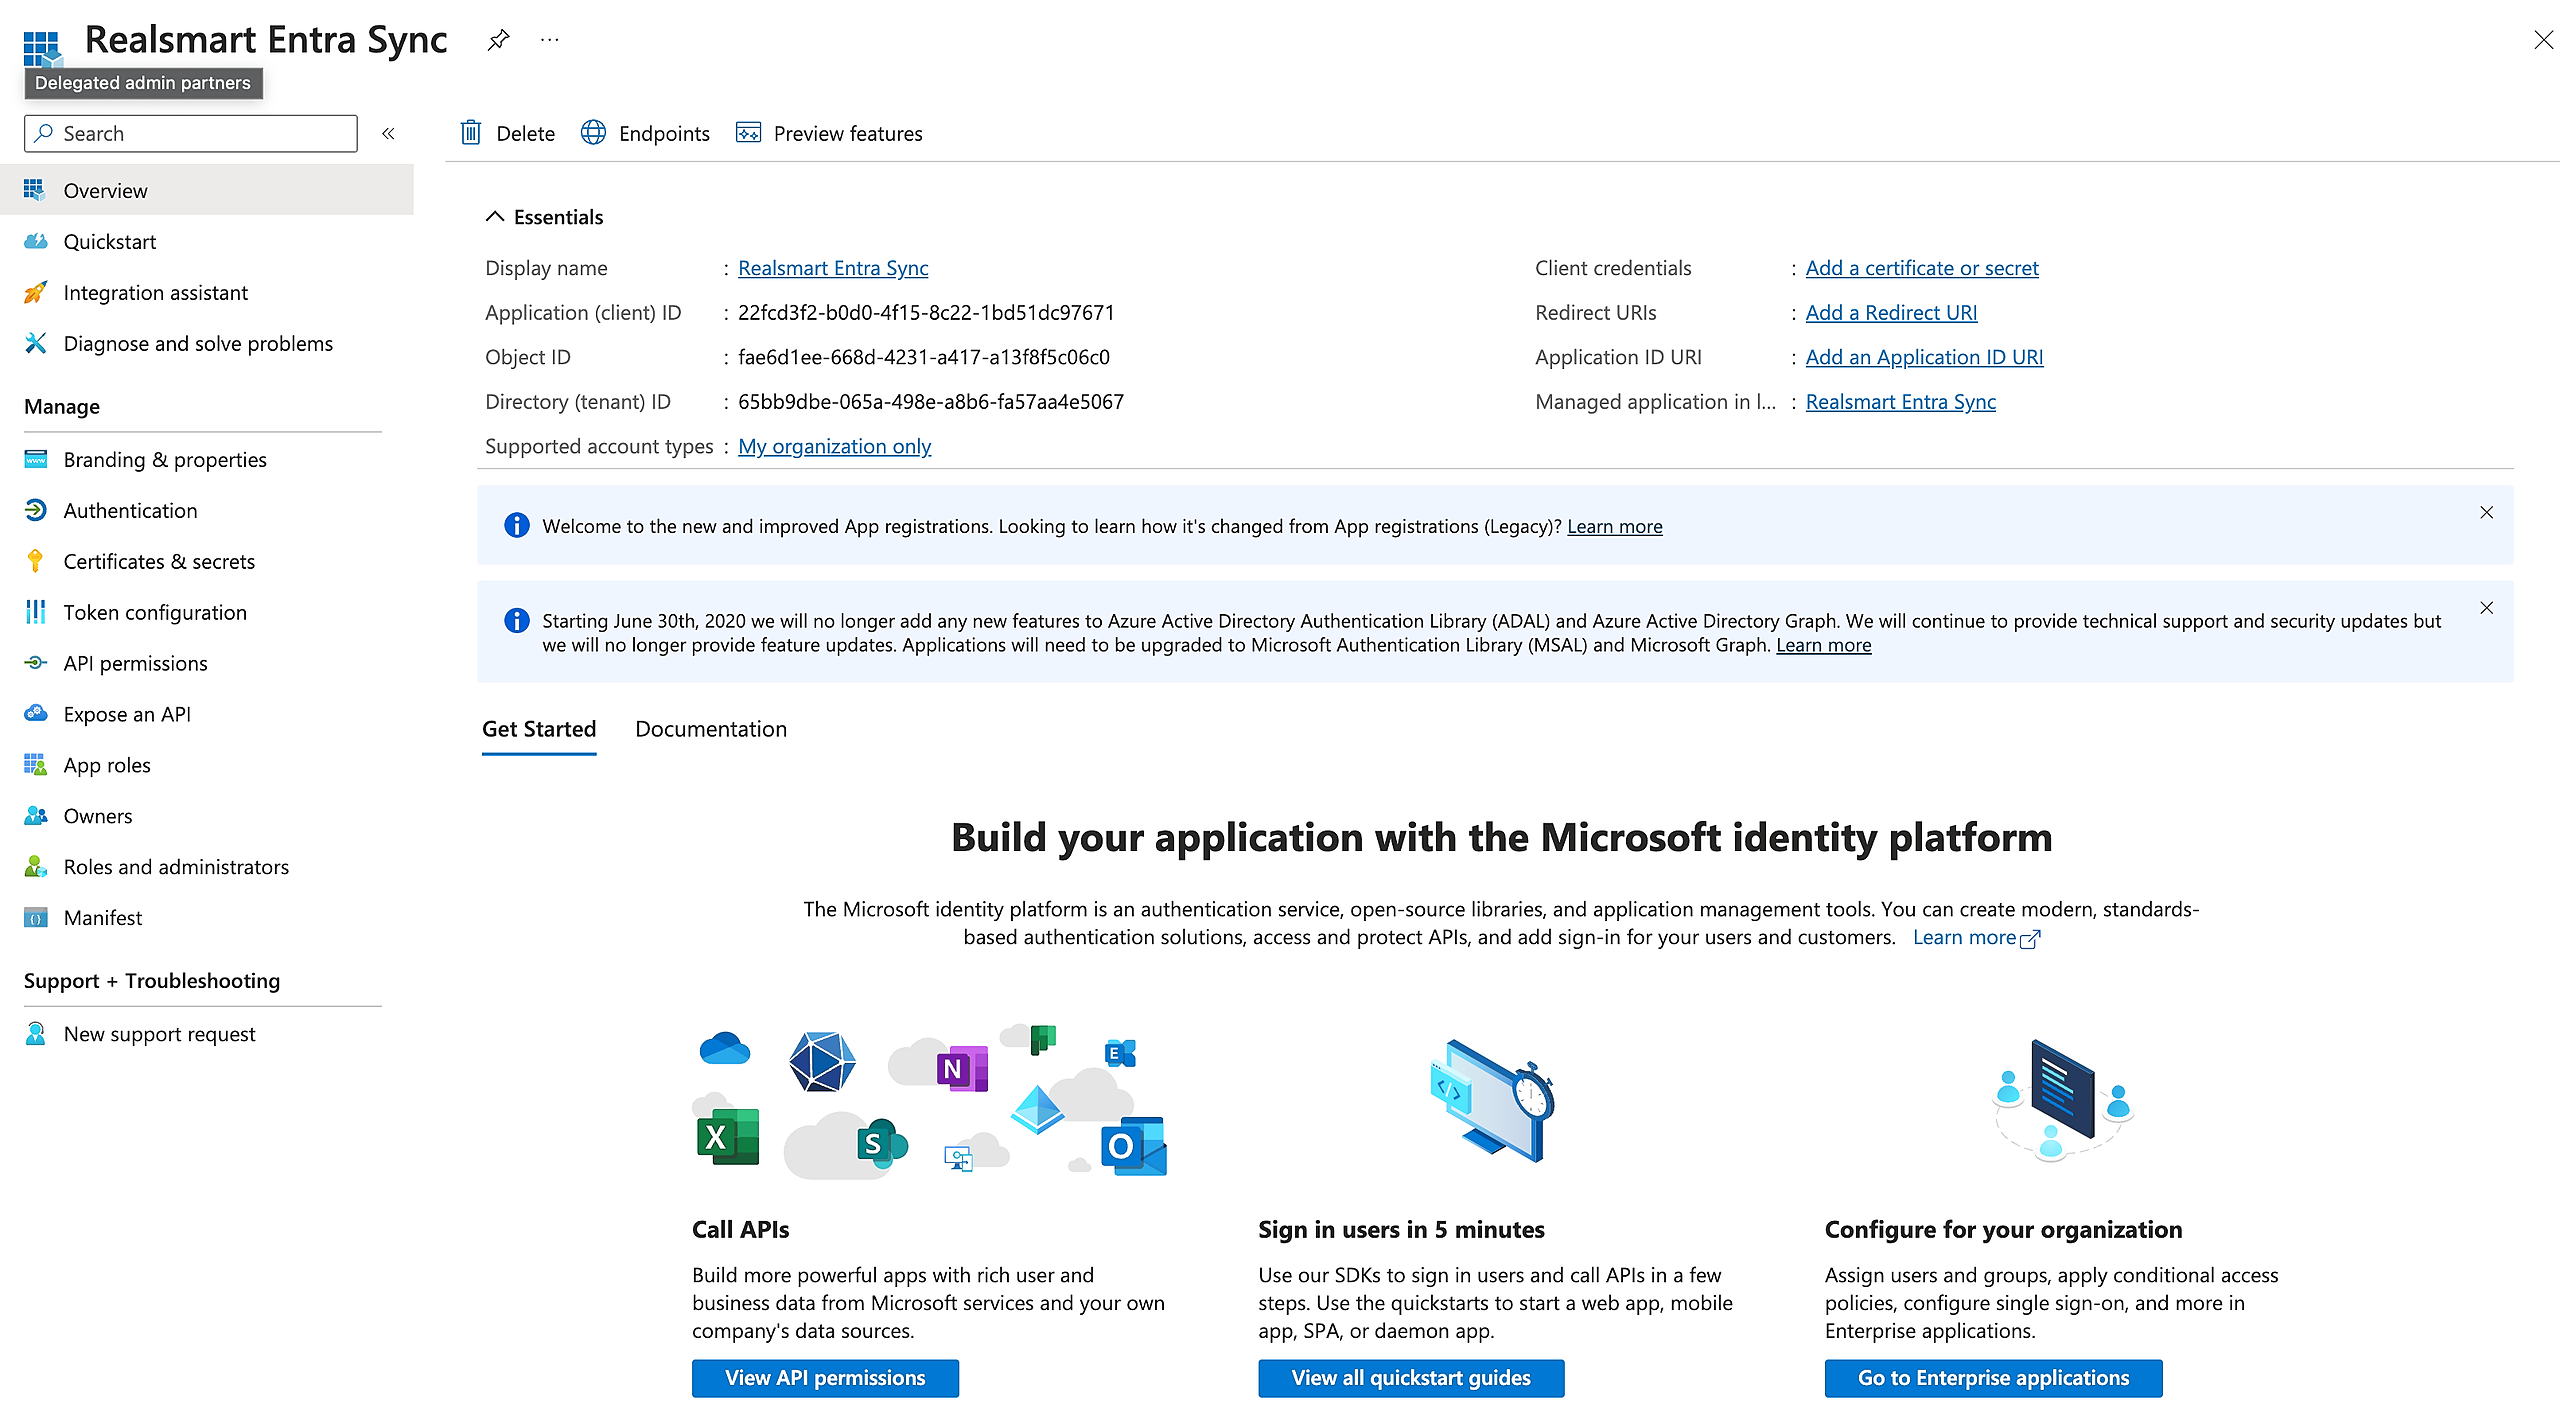
Once you have selected "Register" you will get the following page:
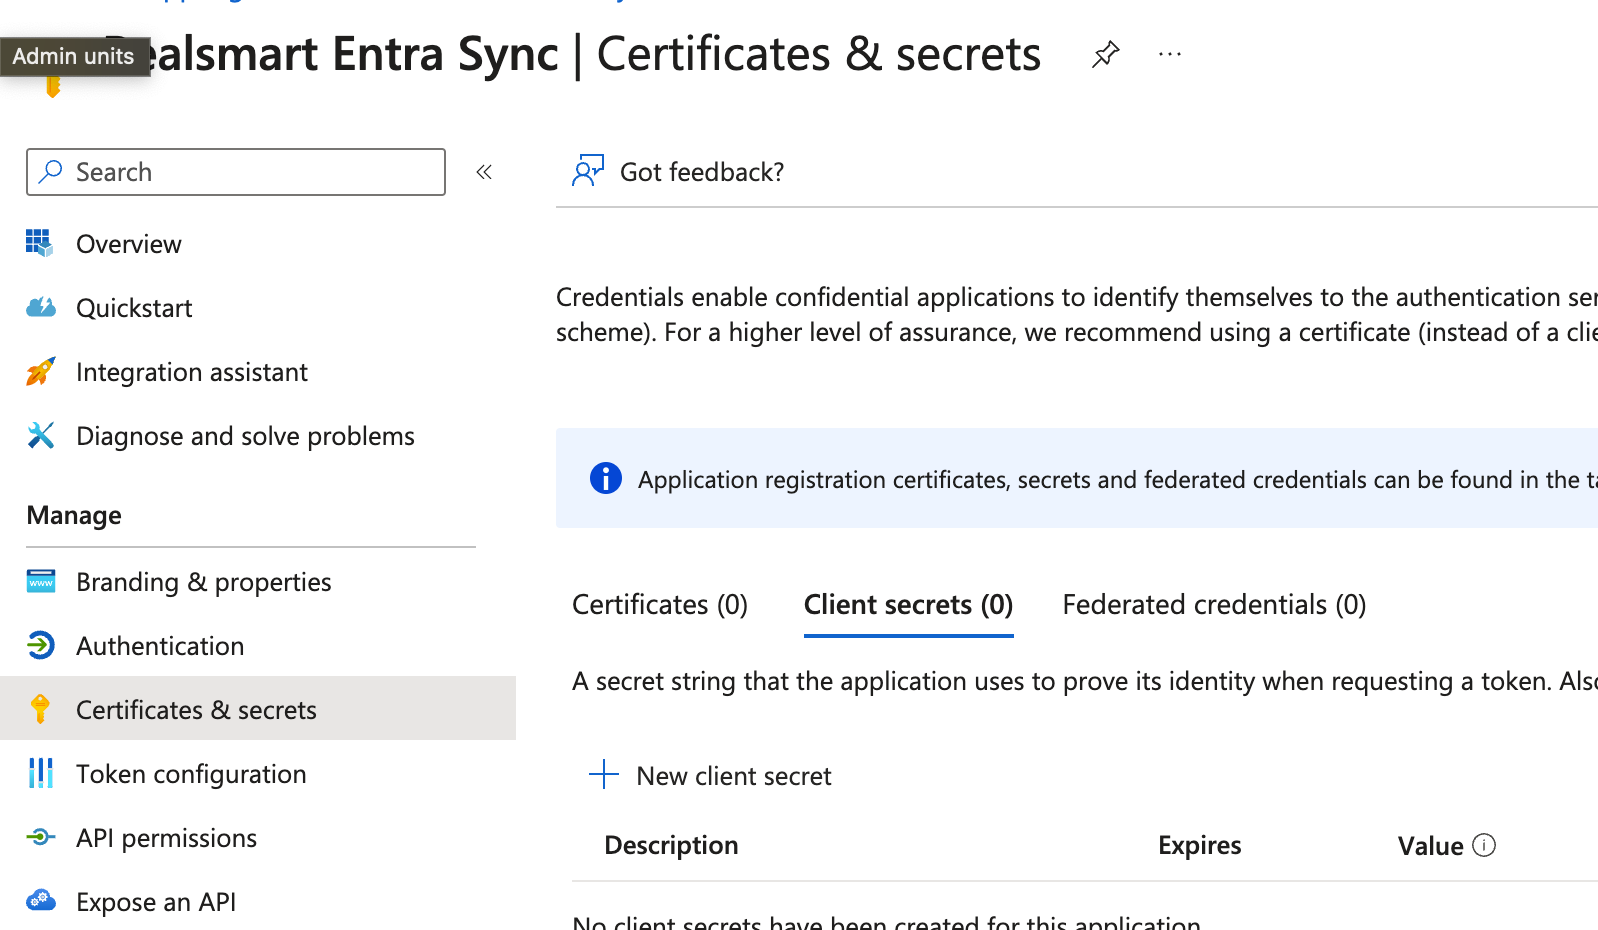
Under manage, select "Certificates & Secrets", and then "New client secret":
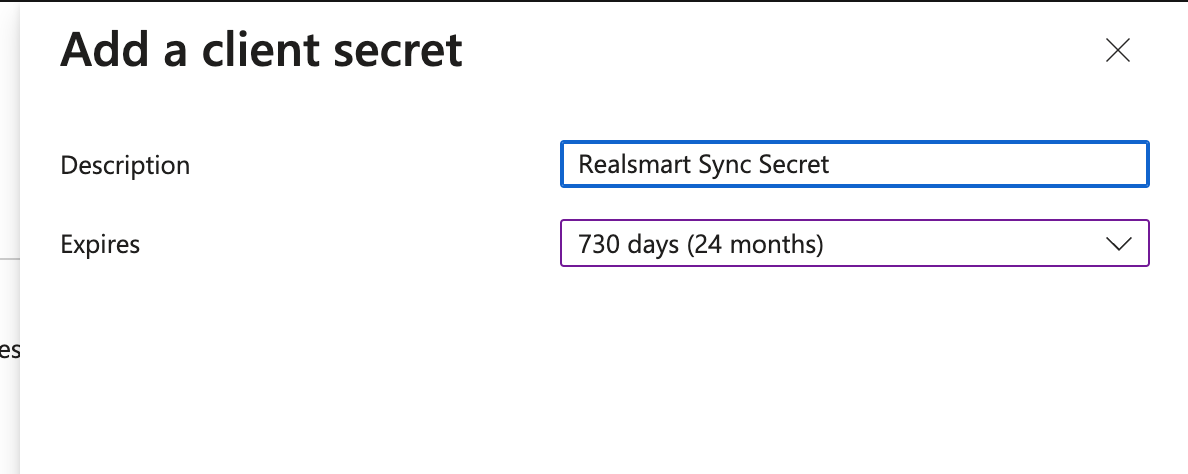
Fill in the client secret as follows, please note the expiration date of your secret, as this process will need to be repeated before the secret expires:
The next page is very important, it contains the "Client Secret" and the "Client Secret ID", the secret is only displayed this one time.

Once you have noted the secret value down (remember this is in the "Value" column, you can insert the "Value" into Client Secret field, The Client ID and Tenant ID can be found on the "Overview" page of your App registration titled "Application (client) ID" and "Directory (tenant) ID:
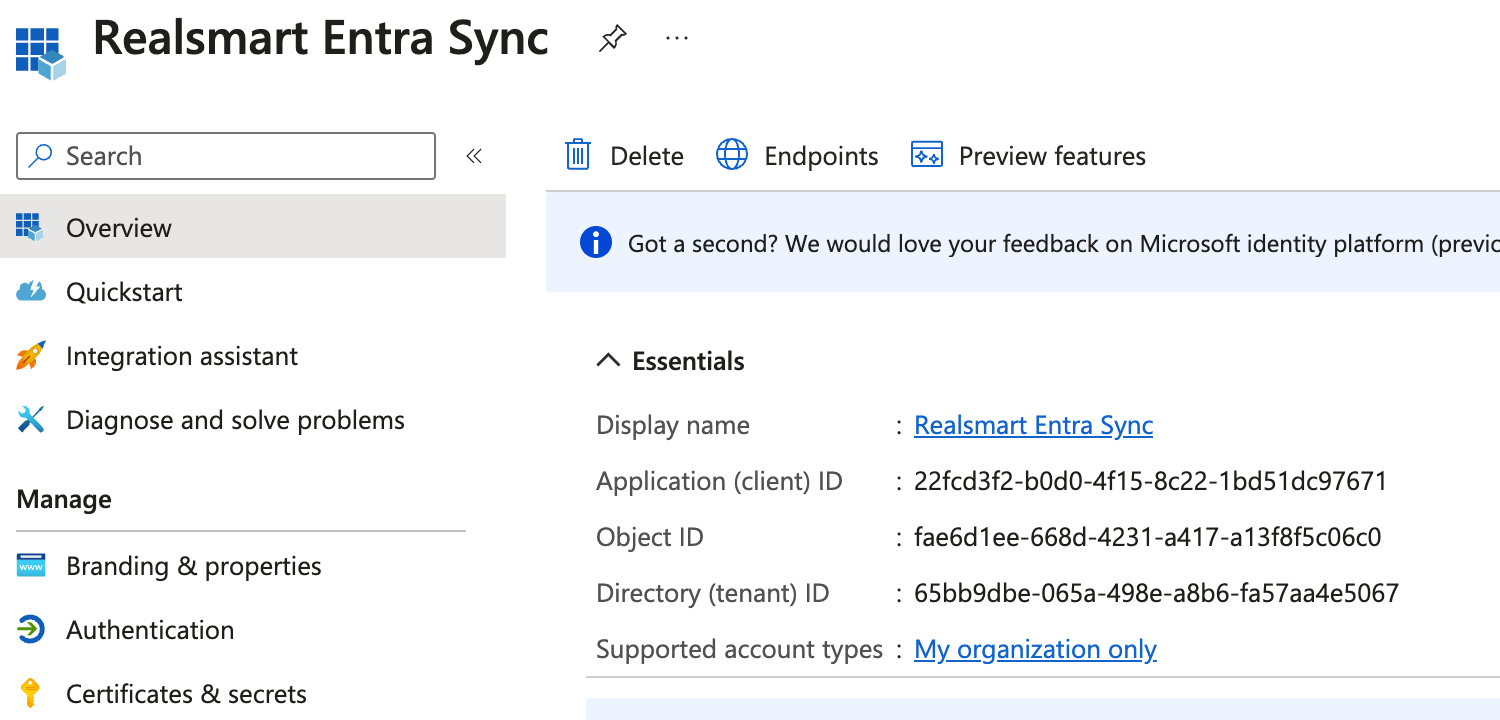

If you now go back to "Overview" you can copy the "Directory (tenant) ID", and paste that into your realsmart settings:

Now Realsmart can communicate with your Entra instance, your newly generated secret needs API permissions to read and write to Entra, select "API permissions" from the left hand column, then you are going to select "Add a permission", and then from the side menu "Microsoft Graph", which will show you a page as follows:
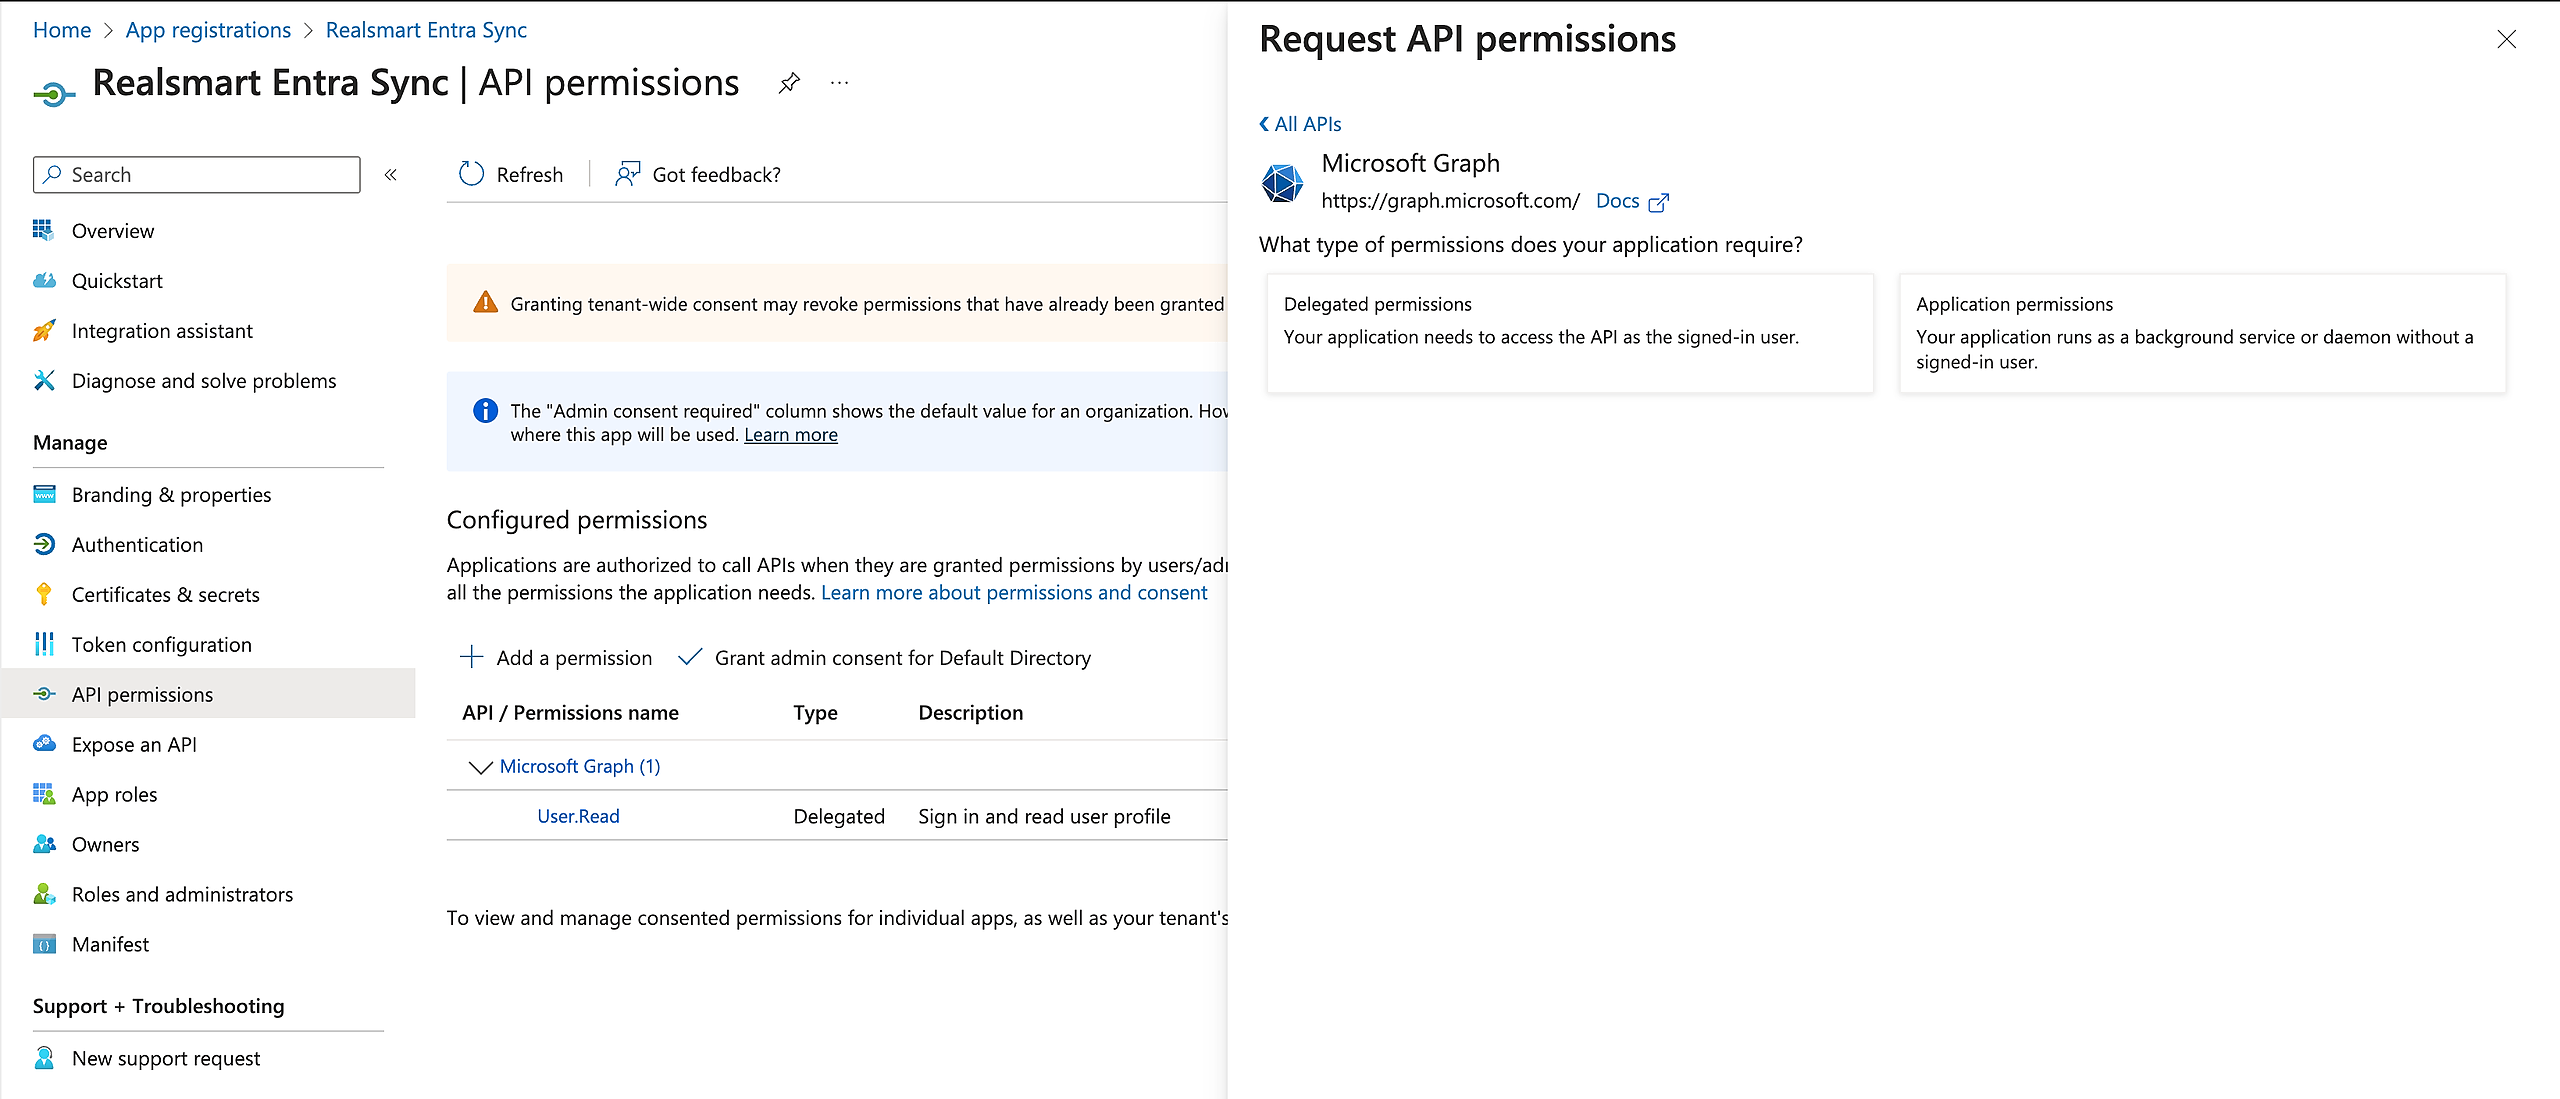
You are then going to select "Application permissions":
And from the drop-downs, select all of the following:
Administrative Unit
All sub items
AppRoleAssignment
All sub items
Calendars
All sub items
Contacts
All sub items
Directory
All sub items
Domain
All sub items
EduAdministration, EduCurricula, EduReports-Reading, Edureports-Reflect, EduRoster
All sub items
Group, GroupMember
All sub items
Member
All sub items
MultiTenantOrganization
All sub items
Organization, OrganizationalBranding, OrgContact
All sub items
People, People Settings
All sub items
ProfilePhoto
All sub items
RoleSpecificPermissionGrant, RoleAssignmentSchedule, RoleEligibilitySchedule, RoleManagementAlert, RoleManagementPolicy, RoleManagement
All sub items
Sites
All sub items
TeamMember, TeamsActivity,TeamsAppInstallation,TeamSettings,TeamsTab,TeamsUserConfiguration,Team,TeamTemplates,TeamworkAppSettings,TeamworkDevice,TeamworkTag,Teamwork
All sub items
User-Mail, User-Phone, User, UserTeamwork
All sub items
Once this process has been completed, and confirmed, you will see a page as follows, on this page you will then select "Grant admin consent for Default Directory":

The app has now been registered, with the permissions it requires applied.
Realsmart Settings
You will then select whether to sync:
Groups
Administrative Units
Includes, mentors, learners, year groups
Teams
Converts Groups into a Team Tab
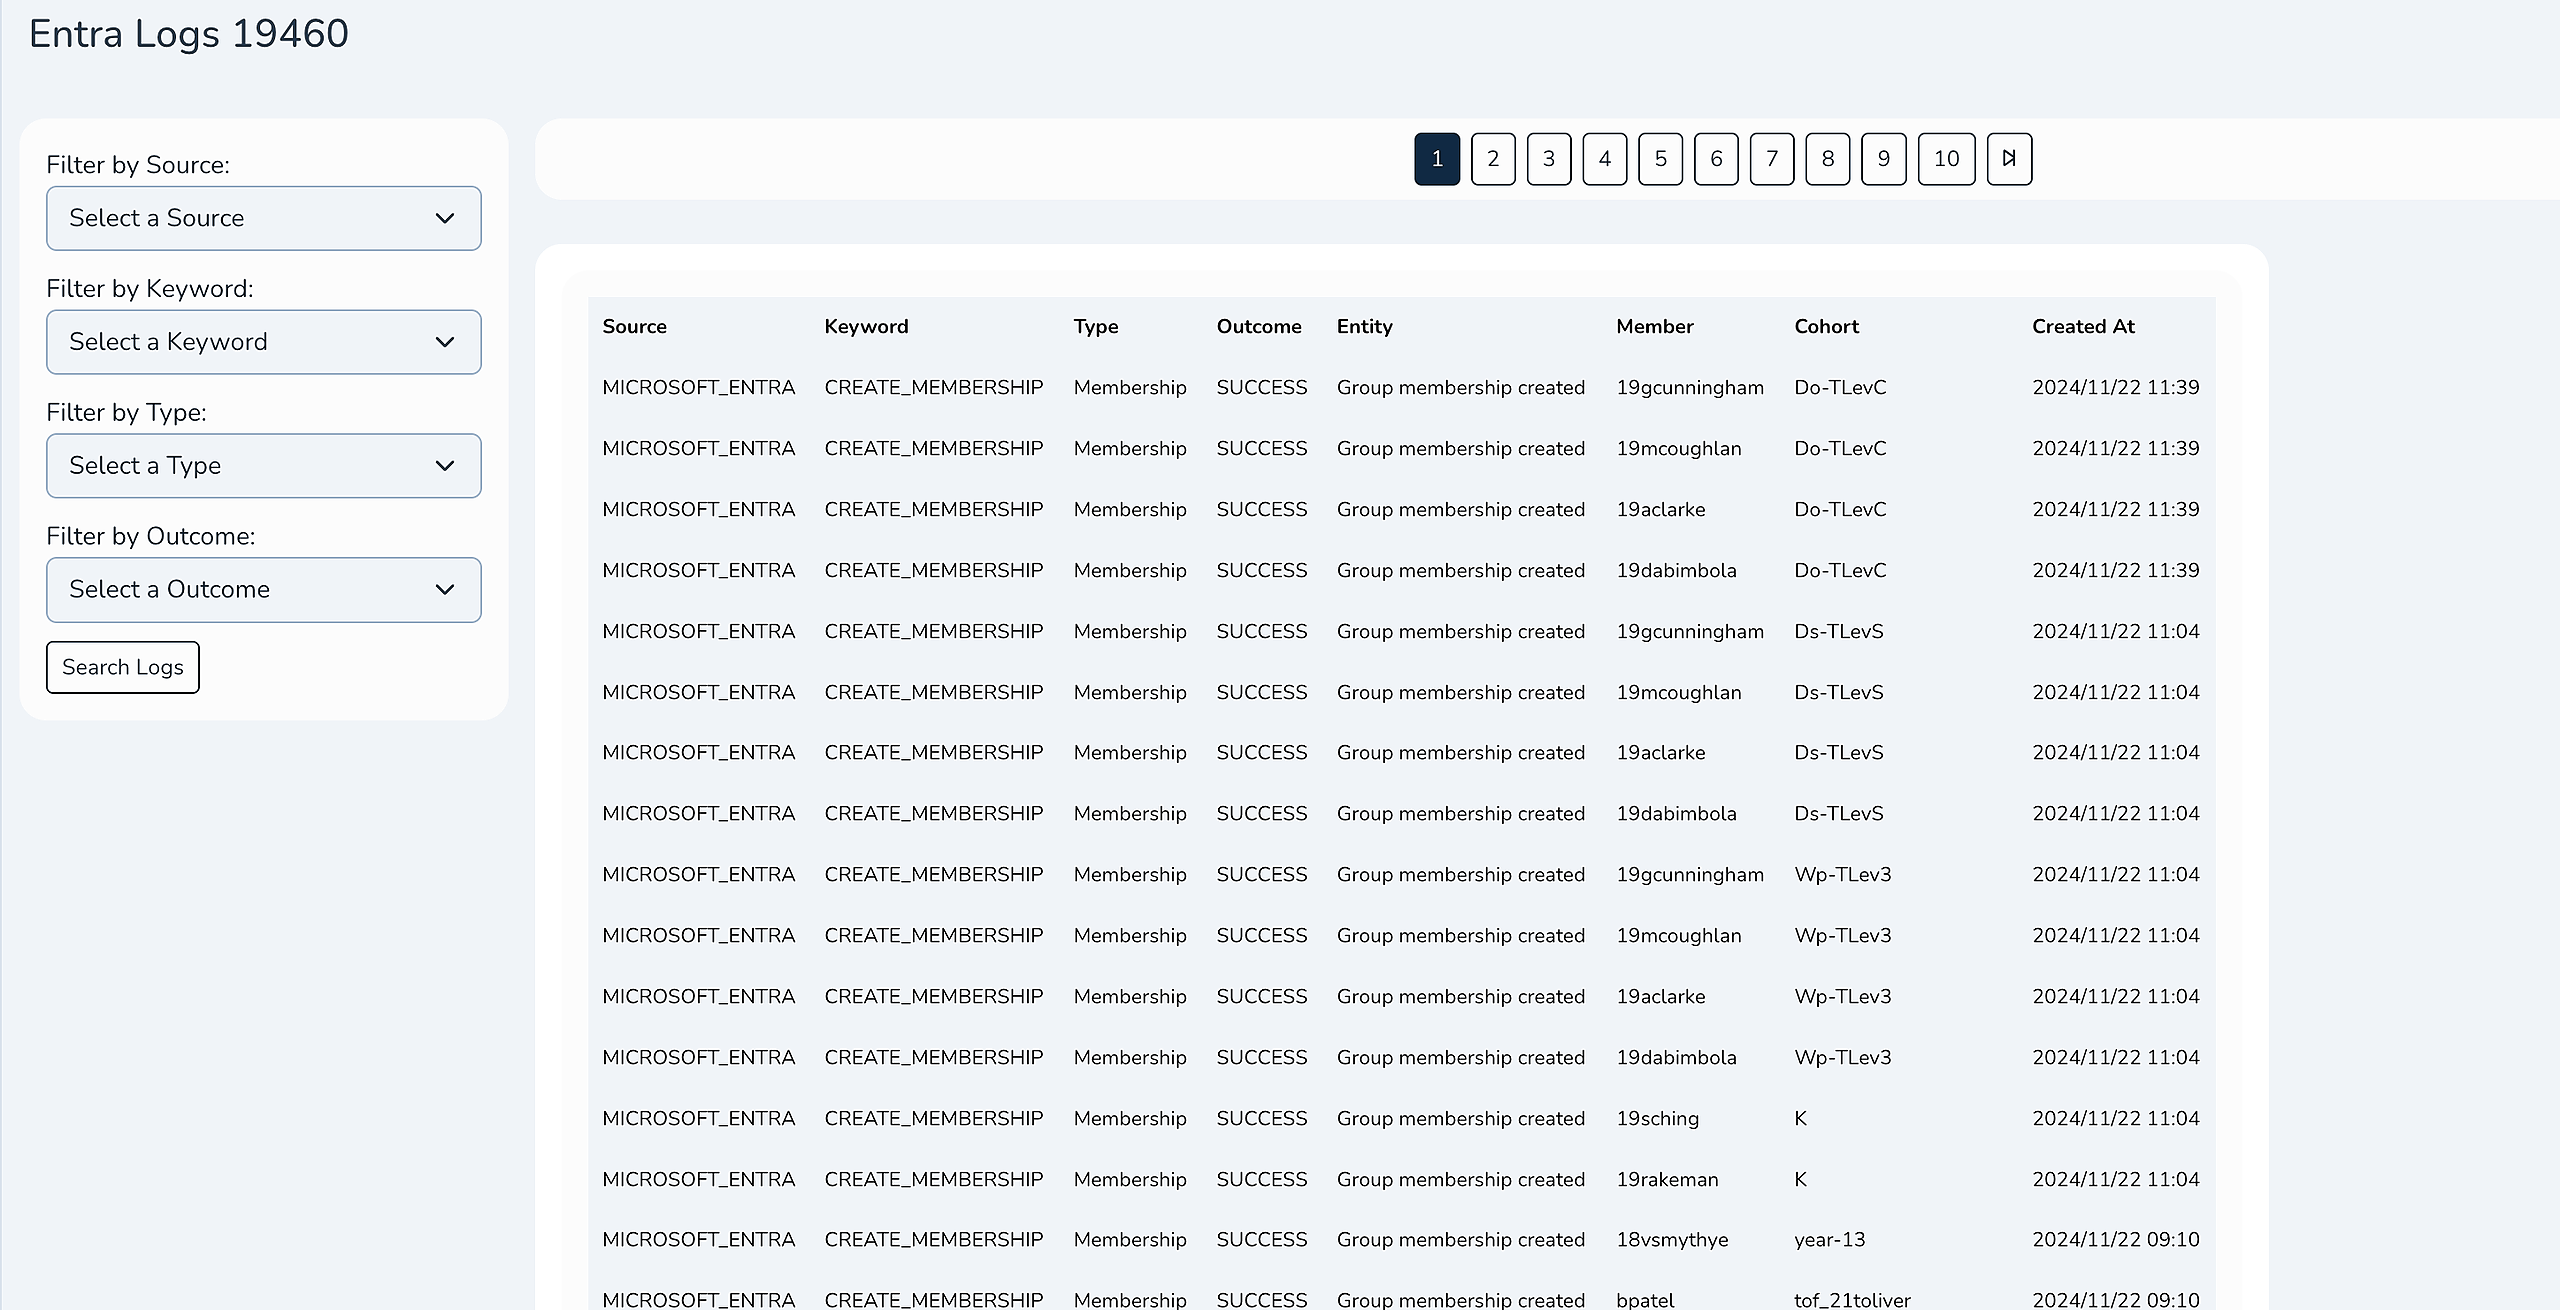
The sync will run automatically three times per day, once around 4am, then again at 8am and 12pm, you can view logs of what has changed from smartadmin: