How can we help?
Get help straight from our team...
smartsync
Syncing Apple School Manager With Your MAT
We provide a solution for syncing your individual schools with Apple School Manager, but what if you would like to sync multiple schools from your MAT to Apple School Manager?
Updated 2 weeks ago
Before setting up our sync tool with your MAT, make sure that you read through our guide on syncing an individual school; https://help.realsmart.co.uk/help/connecting-realsmart-to-apple-school-manager-via-sftp-and-uploading-data.
Accessing the MAT Apple Sync Area
Firstly, ensure you are logged in with an MAT account in Realsmart, and then go to the following URL: https://provision.realsmart.co.uk/admin/mat/sync/apple.
You can also get to this area by clicking on MAT Dashboard on the sidebar and then MAT Apple Sync.
Once you have landed in this area, you will see 3 options which are located at the top of the page:
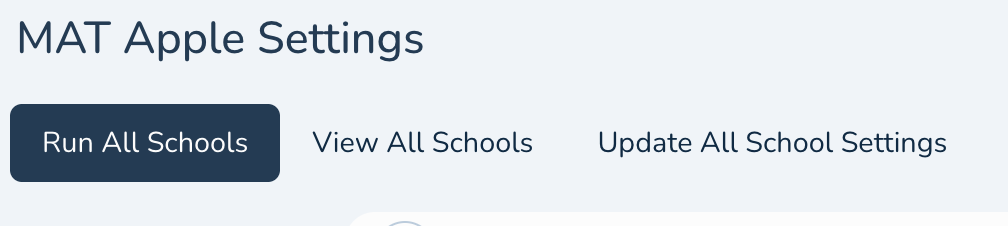
Run all schools - This area, which is the landing page, allows you to generate a CSV for a selection of schools.
View all schools - This area, allows you to view, and amend, or run an Apple Sync for each of the schools in your MAT.
Update all school settings - This area is where you might want to visit if you would like to set all of your schools to have the same Apple School Manager connection details (which is standard).
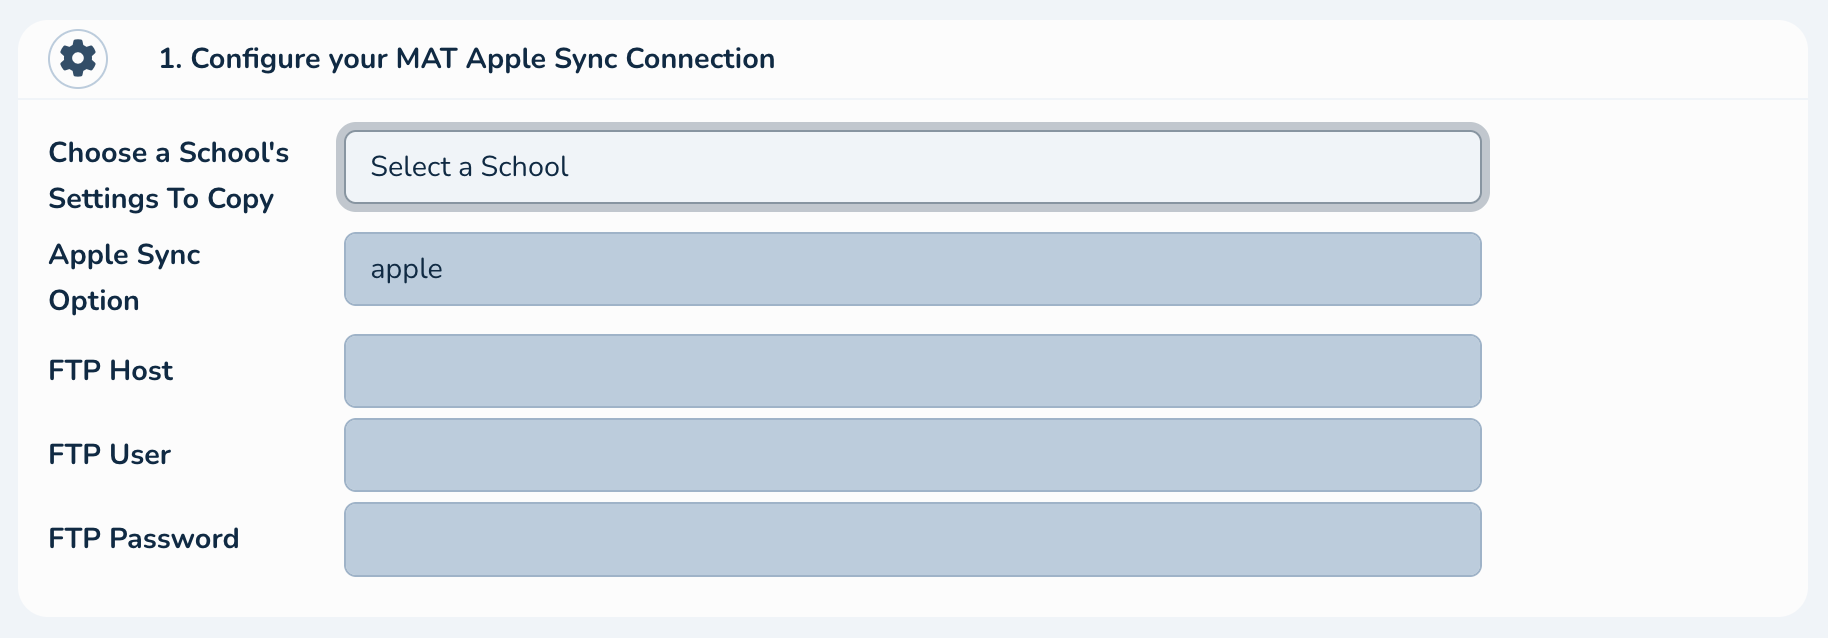
Run All Schools
Firstly, you will select a school from within your trust you would like to extract the Apple School Manager connection details from, this will then populate the Host, User & Password fields for you:
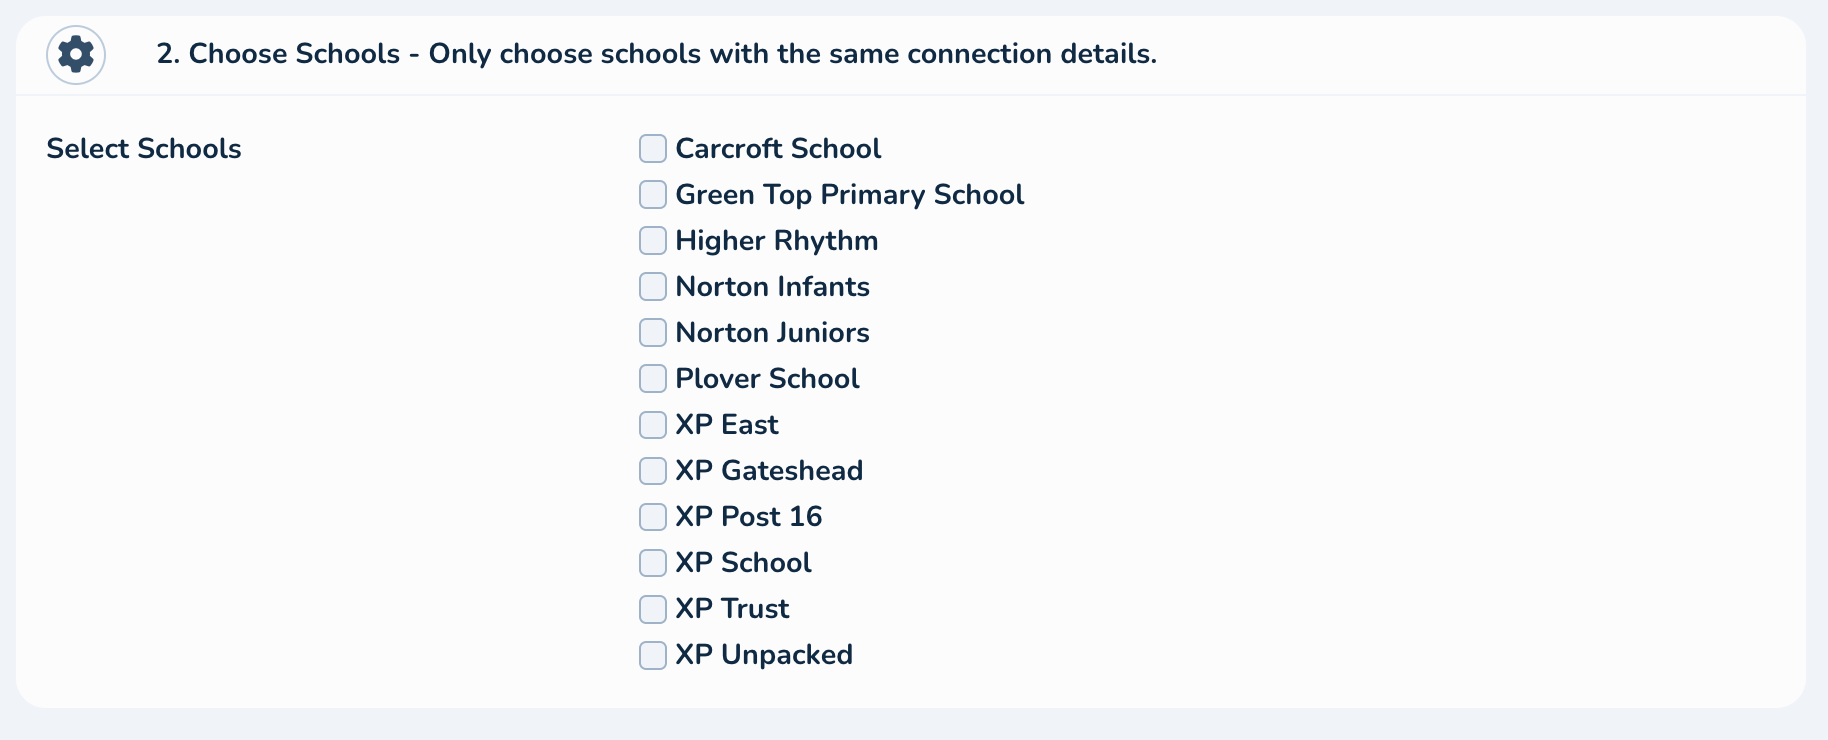
Once you have selected your connection details, you will select schools that you would like to sync, all of the schools selected should share the same connection details as above:
Once you have selected the schools you would like to sync, select "Generate MAT CSVs", once this process has completed you will get a success message in the bottom right:
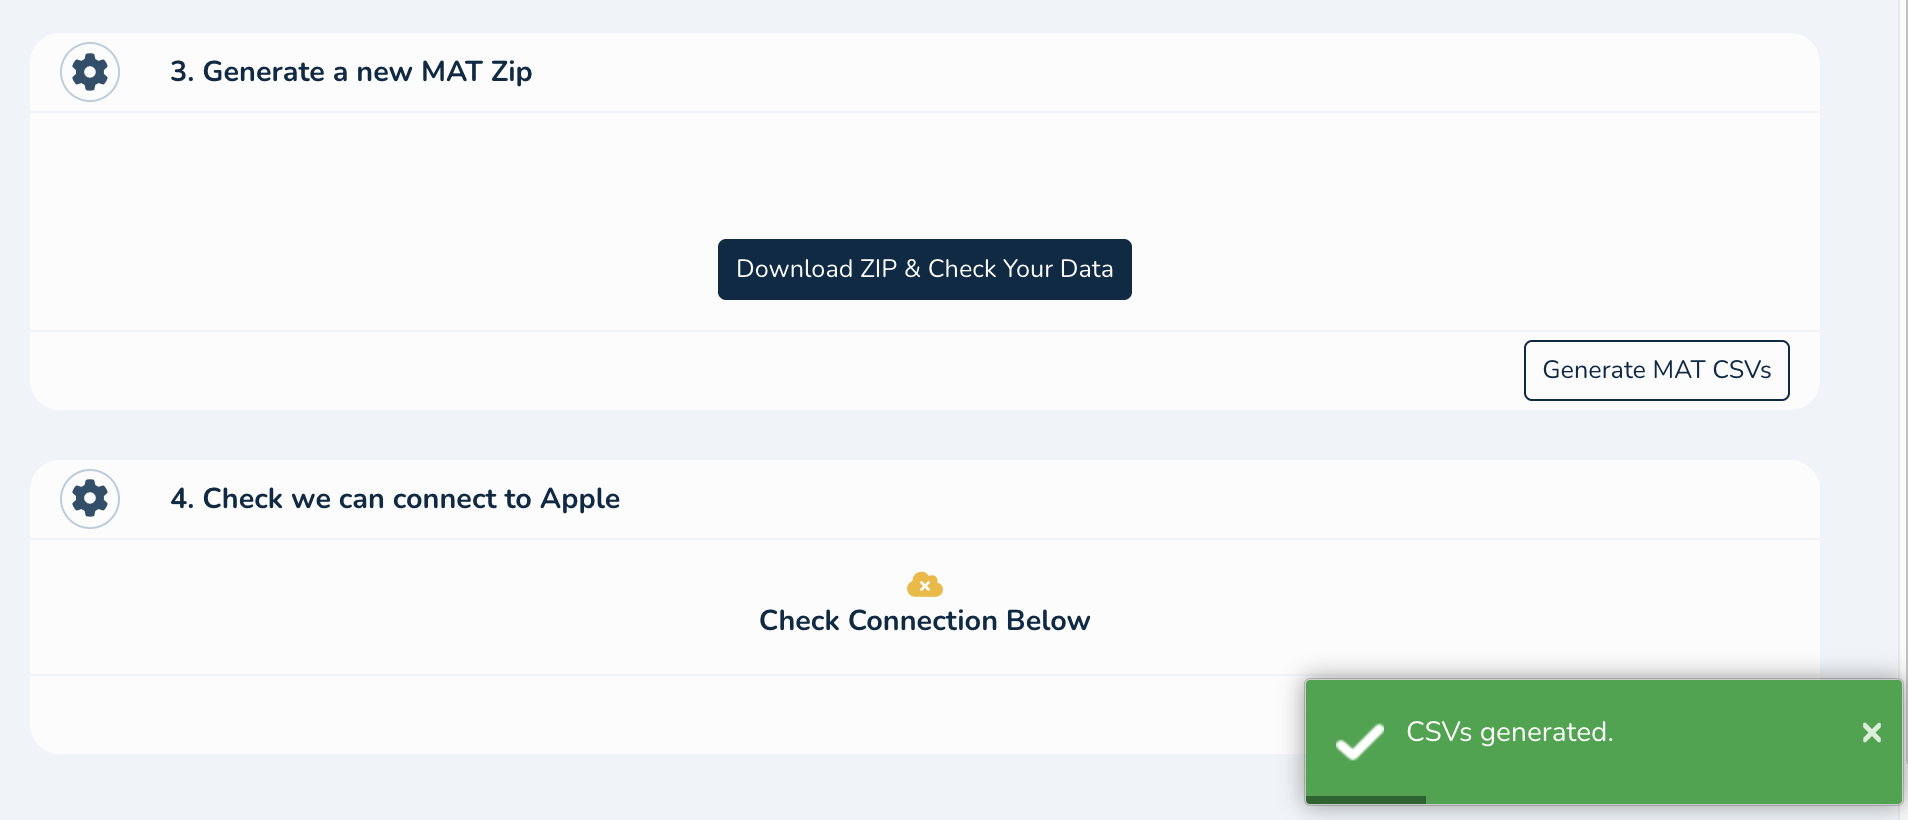
You will then need to test the connection with Apple School Manager and ensure you have ASM open, and on the correct page:
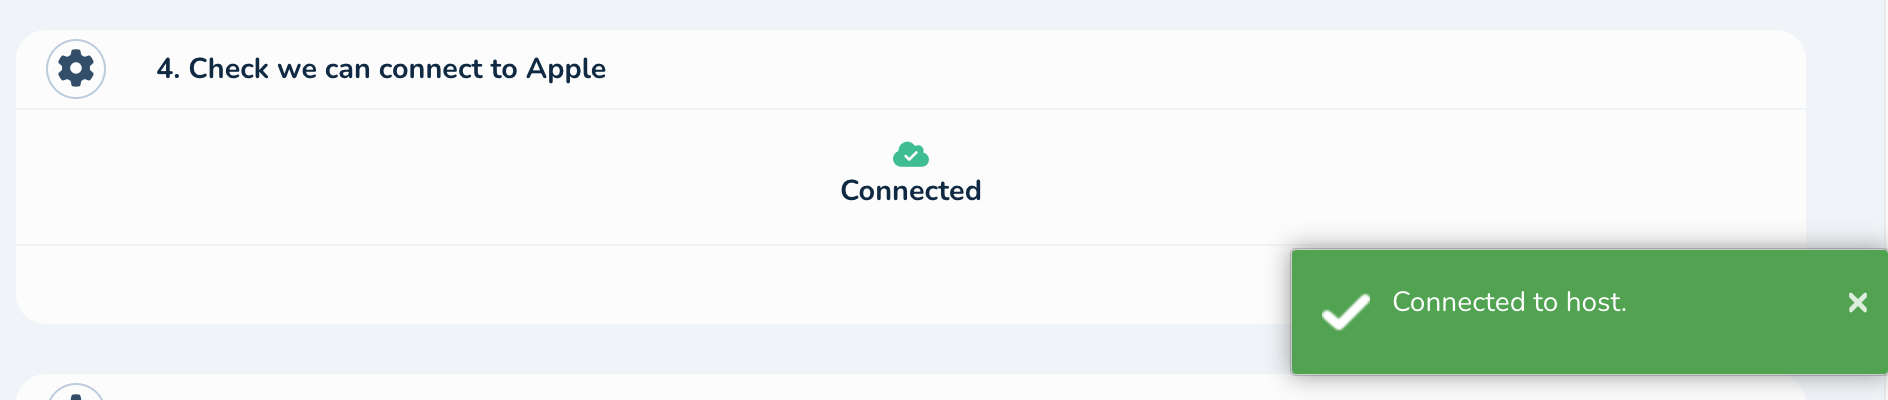
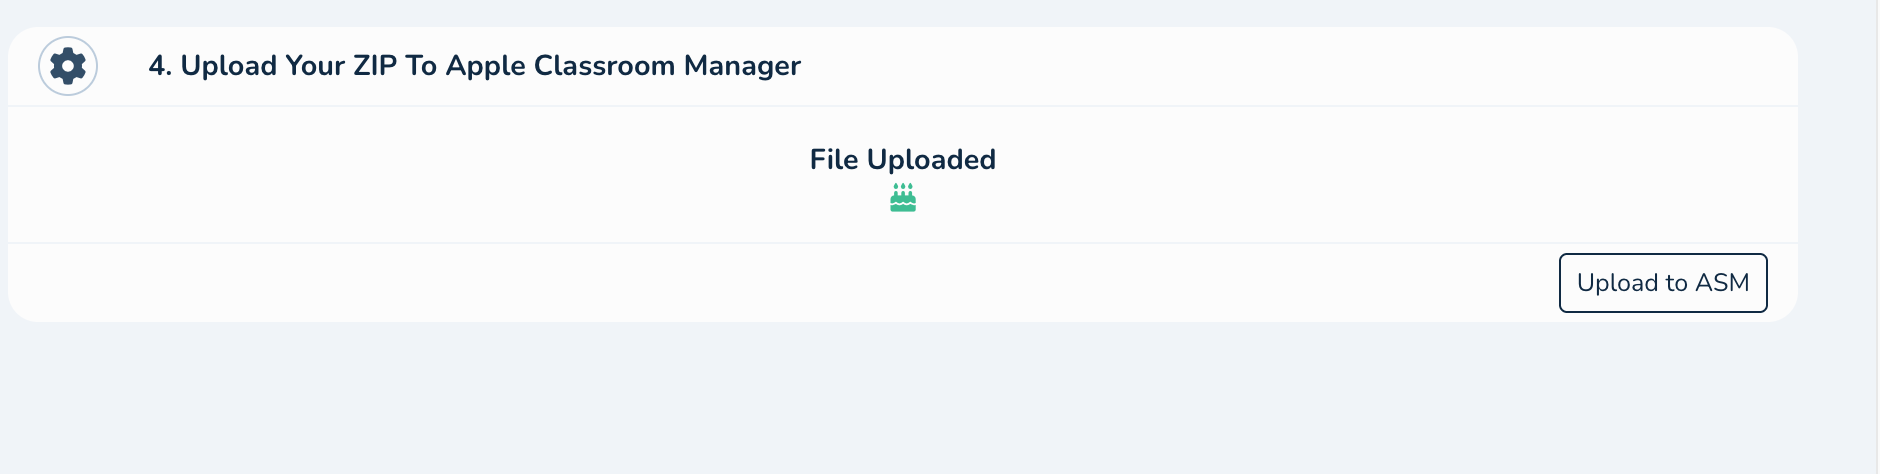
After this you will select "Upload to ASM" which if successful will give you another success message:
You can now continue as per our other guide in Apple School Manager to continue with the sync.
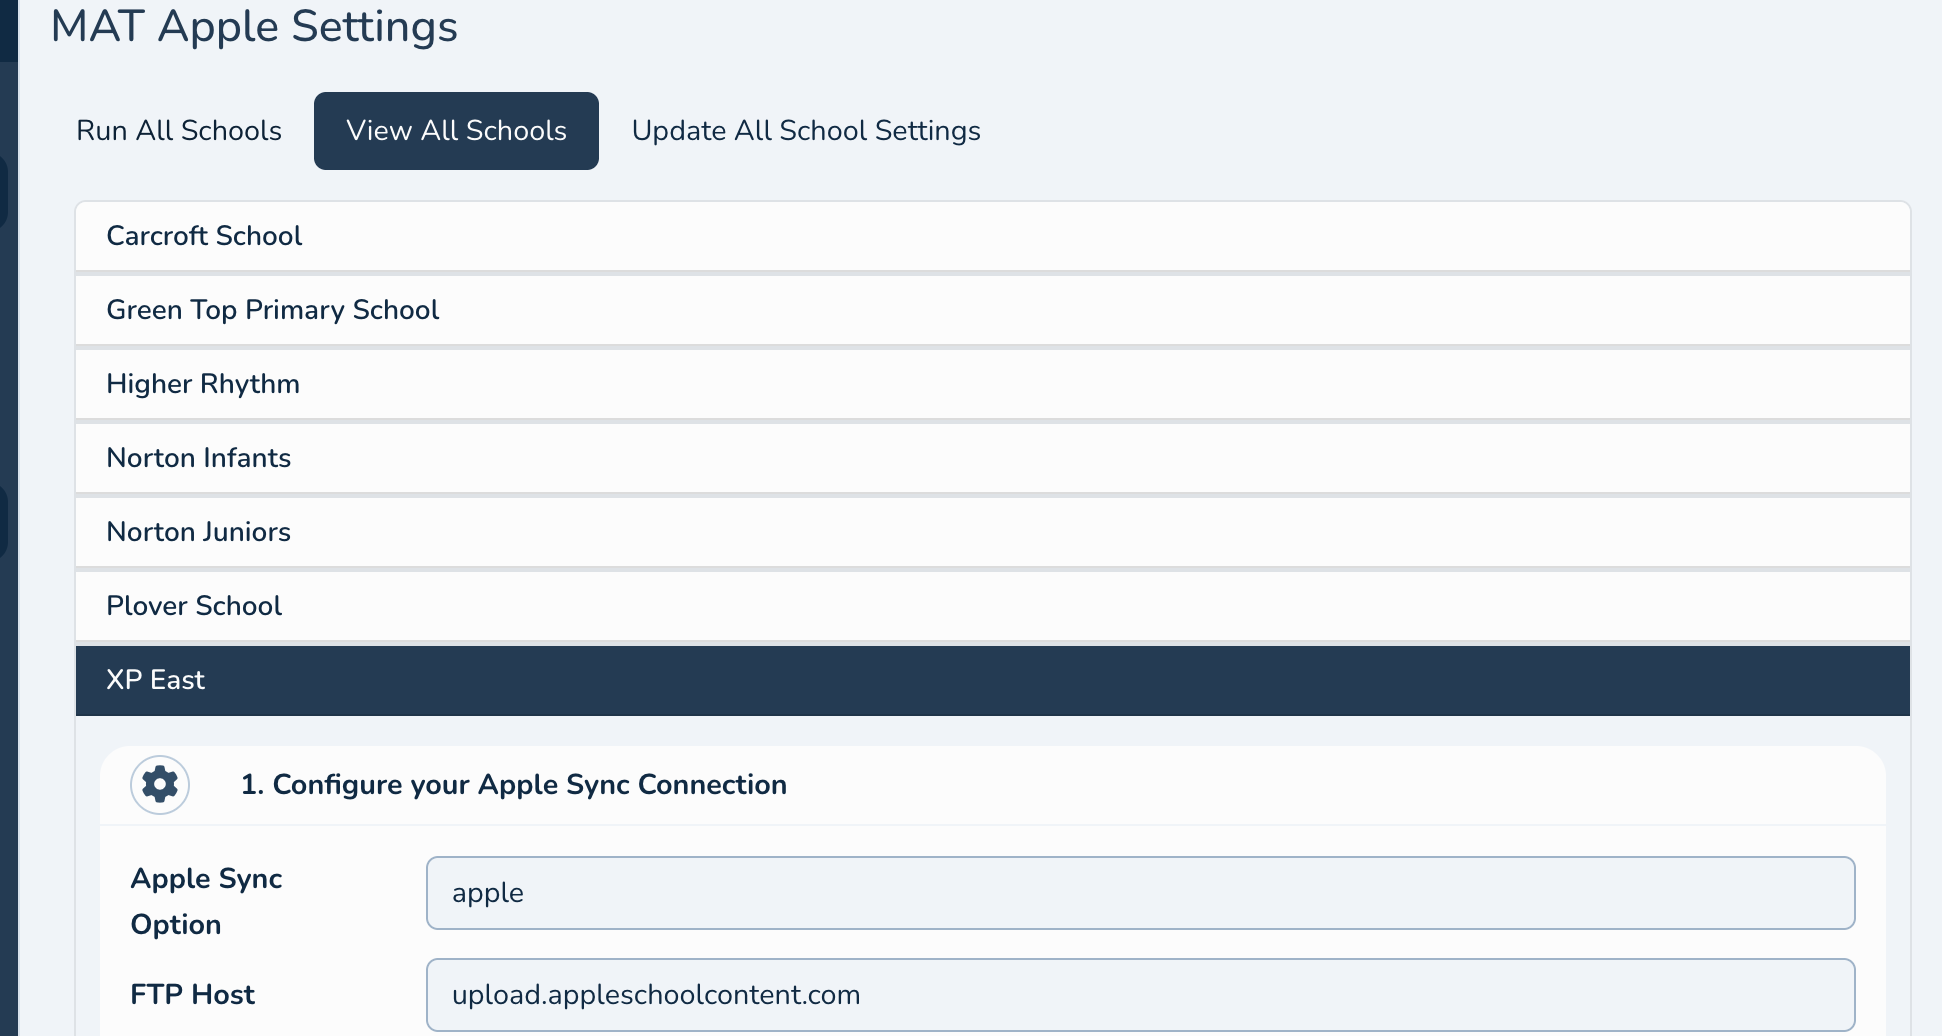
View All Schools
The view all schools area is simply a way to view each of the individuals schools settings from one location for your convenience and looks as follows:
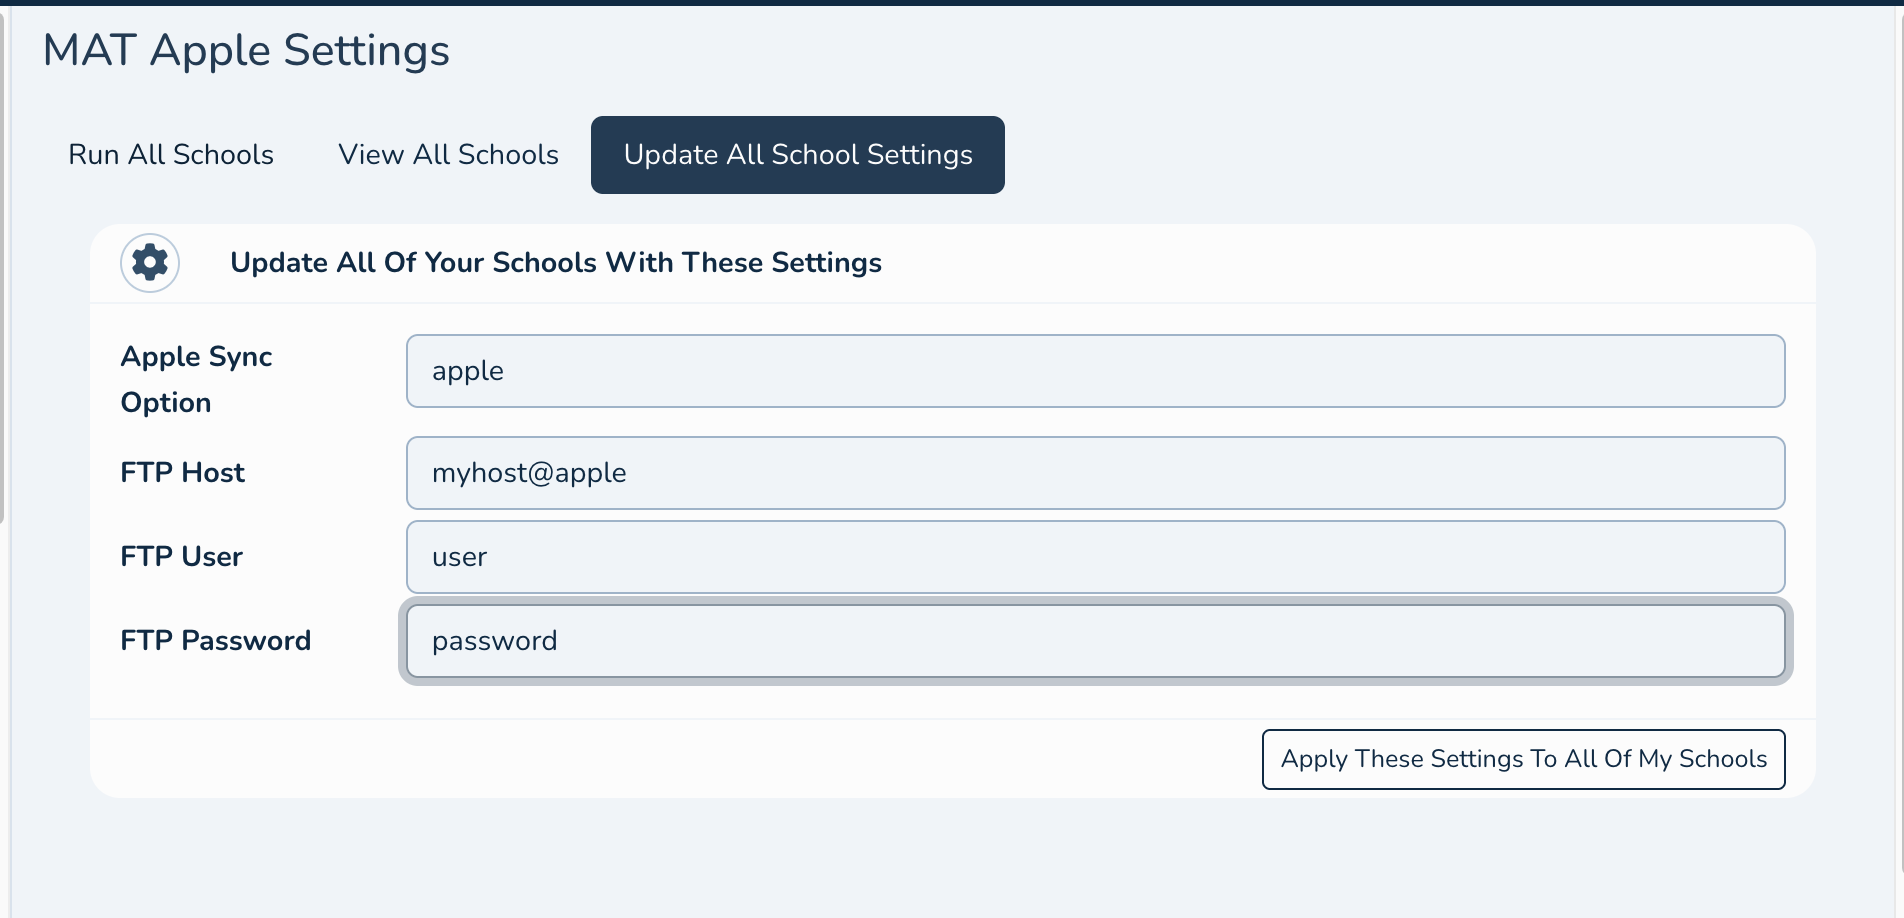
Update All School Settings
If you would like to set all of your schools to a particular Apple School Manager set of settings, you can do this from this area, this is a standard setup for schools so this is a great place to start:
You can then go back to the individual schools in the "View all Schools" section, and view your updated settings.