Overview
Smart WordPress Calendar lets administrators create, edit, import, and display calendar events anywhere on the site using the [smart_wordpress_calendar] shortcode.
It can be used to:
Display events in a table or carousel layout
Show one calendar or combine multiple calendars in a single output
Hide past events or include them when needed
Manage events manually in WordPress
Import events from CSV or ICS files
Accessing the plugin
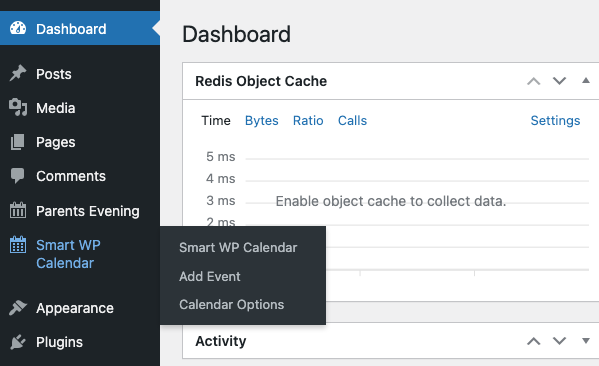
In the WordPress admin menu, go to Smart WP Calendar.
You will see three main areas:
Smart WP Calendar: view, filter, and delete events
Add Event: create or edit an event
Calendar Options: manage calendar names, default calendar, generated IDs, and imports
Setting up calendar names
Before adding events or using the shortcode, configure at least one calendar name.
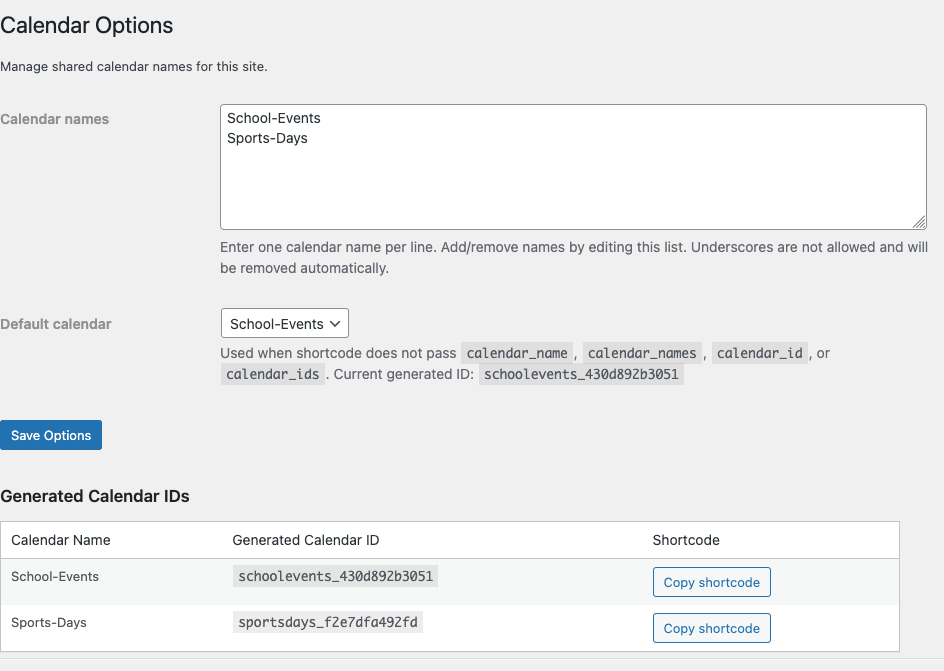
How to configure calendar names
Go to Smart WP Calendar → Calendar Options.
In Calendar names, enter one calendar name per line.
Choose a Default calendar.
Click Save Options.
Example calendar names:
JavaScriptSchool Main
Trust Events
Sports Fixtures
What the default calendar does
The default calendar is used when the shortcode is added without specifying a calendar name or calendar ID.
The plugin also generates a calendar ID for each calendar name. These IDs can be copied from the Generated Calendar IDs table if needed.
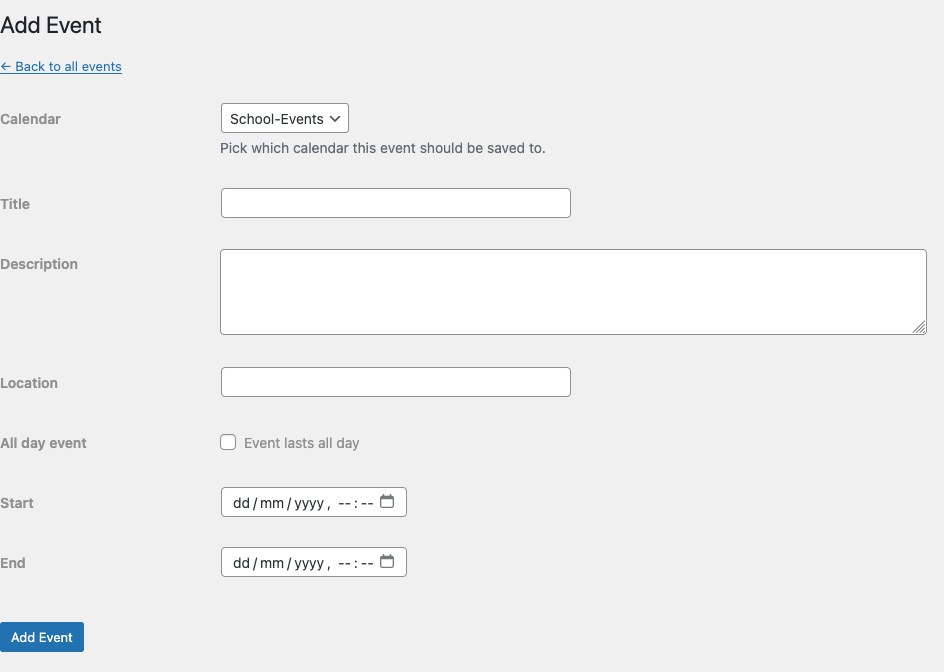
Adding events manually
Create a new event
Go to Smart WP Calendar → Add Event.
Select the calendar the event should belong to.
Enter the event title.
Add an optional description.
Add an optional location.
Tick All day event if the event lasts the full day.
Enter the start and end date/time.
Click Add Event.
Edit an existing event
Go to Smart WP Calendar.
Find the event in the list.
Click Edit.
Update the fields you need.
Click Update Event.
Delete events
From the main events screen you can:
Delete a single event using the Delete link
Select multiple events and use Delete selected

Filtering events in the admin area
The main Smart WP Calendar screen shows all saved events for your configured calendars.
You can filter the list by calendar using the Calendar dropdown above the table. This is useful when the site uses multiple calendars and you only want to review one set of events.
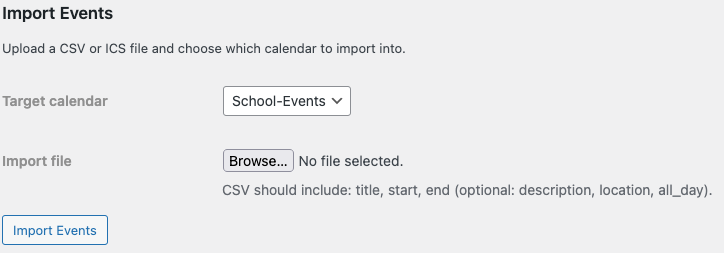
Importing events
The plugin supports importing events from CSV and ICS files.
How to import events
Go to Smart WP Calendar → Calendar Options.
Scroll to Import Events.
Choose the Target calendar.
Upload a
.csvor.icsfile.Click Import Events.
After a successful import, the plugin shows a confirmation message with the number of events imported.
CSV format
CSV files must include these columns:
JavaScripttitle,start,endOptional columns:
JavaScriptdescription,location,all_dayExample:
JavaScripttitle,start,end,description,location,all_day
Parents Evening,2026-05-12 18:00,2026-05-12 20:00,Evening appointments for parents,Main Hall,no
Inset Day,2026-06-01,2026-06-01,School closed to pupils,,yes
ICS format
ICS files can be imported directly from other calendar systems if they contain standard event data such as title, description, location, start date, and end date.
Showing events on a page
Use the shortcode below inside a page, post, or shortcode block:
JavaScript[smart_wordpress_calendar]If a default calendar is configured, this is enough to display events.
Shortcode examples
Use the default calendar
JavaScript[smart_wordpress_calendar]Show one named calendar
JavaScript[smart_wordpress_calendar calendar_name="School Main"]Merge multiple named calendars
JavaScript[smart_wordpress_calendar calendar_names="School Main,Trust Events"]Use generated calendar IDs instead of names
JavaScript[smart_wordpress_calendar calendar_id="schoolmain"]Merge multiple calendar IDs
JavaScript[smart_wordpress_calendar calendar_ids="schoolmain,trustevents"]Show a carousel instead of a table
JavaScript[smart_wordpress_calendar display="carousel"]Show past events as well
JavaScript[smart_wordpress_calendar show_past="yes"]Limit the number of events shown
JavaScript[smart_wordpress_calendar limit="20"]Set how many events appear per carousel slide
JavaScript[smart_wordpress_calendar display="carousel" slides_to_show="3"]Full example
JavaScript[smart_wordpress_calendar calendar_names="School Main,Trust Events" display="carousel" limit="12" show_past="no" slides_to_show="3"]Shortcode settings reference
calendar_name
Use a single configured calendar name.
Example:
JavaScriptcalendar_name="School Main"calendar_names
Use multiple configured calendar names separated by commas.
Example:
JavaScriptcalendar_names="School Main,Trust Events"calendar_id
Use one generated calendar ID instead of a name.
calendar_ids
Use multiple generated calendar IDs separated by commas.
limit
Controls the maximum number of events returned. If omitted, the default is 50.
show_past
Set to yes to include past events. If omitted, only current and future events are shown.
display
Available values:
tablecarousel
The default display is table.
slides_to_show
Only used for carousel display. This controls how many events are grouped into each slide. The default is 3.
How the front-end display works
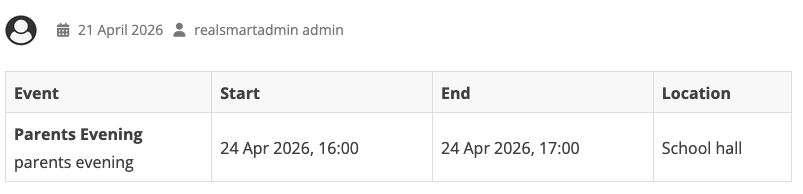
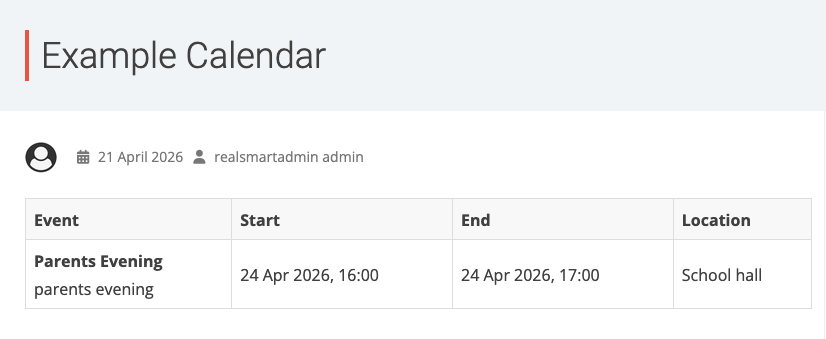
Table display
When using the default table view, visitors will see columns for:
Event
Start
End
Location
The event description appears below the event title when available.
Carousel display
When using carousel mode, events are shown as cards with navigation arrows and dots.
Each event card can show:
Day and month
Event title
Description
Location
Start and end date/time